4.24 Import Data

Drive test data, cell configuration data, and GIS data can be imported into TEMS Discovery. The imported data will be well organized, can be presented in various formats, and can be shared.
4.24.1 Import Drive Test Data
The Import Drive Test Data dialog can be accessed in the following ways:
• Selecting Import | Import Drive Test Data from the File menu on the Main Window.
• Clicking the
Data Import button
in the Main Window toolbar.
• Clicking the
Import Drive Test Data 
button in the Walk-U-Through wizard toolbar.
TEMS Discovery can import the following data formats:
• TEMS (TEMS Investigation, TEMS Pocket, TEMS Automatic)
• Nemo Outdoor, Nemo Handy*
• SwissQual
• Qualcomm
• PCTel scanner
• JDSU AOD/SD5
• Anritsu scanner
• Generic Text File (Delimited)
* Note that Nemo Handy (indoor/walk test) .nmf log file need to zipped together with marker (.mrk), floor print (.jpg, .bmp) and raster configuration (.tab) file in order to be processed correctly.
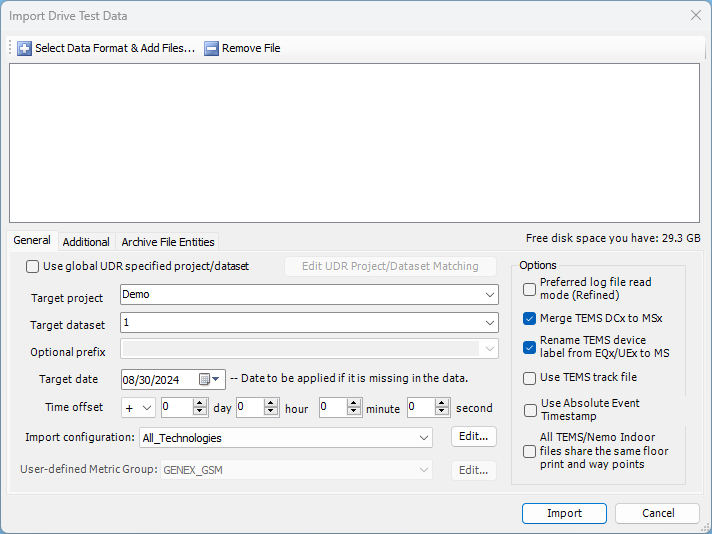
Follow these steps to import data:
1. Click the Select Data Format & Add Files button

to add one or more drive test data files to import.
Please be aware that you must select the data format from the pop-up file open dialog.
2. If the file you have selected is a supported archive file, clicking the file will list all its entities in the Archive File Entities tab page. To select which entity or entities to import, check or uncheck as needed.
3. Select the
Use global UDR specified project/dataset option if you have global UDRs and have specified the
UDR Project Mapping and want to use the global UDRs to decide which project and dataset should be used as the target.
− If you have selected this option and the imported drive test data does not overlap with any of the global UDRs that have a project specified in the mapping, then a default project named _No_UDR_Match_Project will be used as the target project and a default dataset named _UDR_Match_Default_Dataset will be used as the target dataset.
− If a drive test data file does overlap with multiple global UDRs and each of the UDRs is mapped to a different project, then each of these projects will be used as the target project to take the drive test data. You can skip the next two steps if you have chosen this option.
4. Select or enter a new target project name in the Target project field.
5. Select or enter a new target dataset name in the Target dataset field.
6. When importing some drive test data formats, you may be asked to select or enter a new target mobile name in the Target mobile field.
7. If your source drive test data does not contain collection date information, or you want to change the collection date, define the desired data information in the Target Date field.
8. You can define the time offset for the data, or skip it.
9. In the Options section, you have the following independent options:
− Merge TEMS DCx to MSx. Changes the labels of all TEMS DCx devices to MSx.
− Rename TEMS device label from EQx/UEx to MS. Changes the labels of all TEMS EQx devices to MSx.
− Use TEMS track file. TEMS track file location information is used instead of location information saved to .trp file.
− Use Absolute Event Timestamp. If enabled, TEMS events are reported with internal timestamp values, otherwise standard log file Date/Time information is used.
− All TEMS/Nemo indoor files share the same floor print and way points. This option is applicable only to indoor files collected at the same time and same location while some of them without associated floor print information.
10. Select the frame import configuration from the
Frame Import Configuration field, or create/edit the configuration by clicking
Edit/View. See
Metric Frame Import Configuration for more information.
11. If importing a generic text file, select an import configuration from the
Generic User-Defined Metric Group field,
or create/edit configuration by clicking
Edit/View. See
Generic User-defined Metric Groups for more information.
12. In the Additional tab page, you have the following additional options:
− Apply antenna gain offset to user-specified devices.
− Include multiple levels of log file's parent folders as file name prefix. This may avoid overwriting file names if you are importing the data from multiple data collection teams and every team is using the default mmdd.log naming convention for log file name.
− Define Default (Device) Attributes. This option allows you to globally assign certain device attributes for the data to be imported. These attributes can then be utilized for data grouping or for report generation. See
Device Attribute Assignment for more information. You should be very cautious when using this feature to avoid incorrect assignment of device attributes if you are dealing with simultaneous multi-device testing.
− You can select a device attribute assignment template and TEMS Discovery will automatically assign device attributes for the imported device based on these rules. See
Device Attribute Assignment for more information.
Once you click
Import, the task will be placed into the task queue for scheduling, and its status will be indicated in the
Task Window. After the data is imported, it will be listed in the
Project List and the
Data Explorer.
4.24.2 Import Network Configuration
The Import Network Configuration dialog can be accessed in the following ways:
• Selecting Import | Network Configuration from the File menu on the Main Window.
• Clicking the
Import Data button in the Main Window toolbar.
• Clicking the
Import Cell Configuration button

in the
Walk-U-Through wizard toolbar.
TEMS Discovery can import network configuration files of the following formats:
• TEMS .cel or .xml files. These files can be imported directly without requiring additional mapping by the user.
• ACTIX™ cellref. These files can be imported directly without requiring additional mapping by the user.
• ASSET™ .xml files for GSM and WCDMA. These files can be imported directly without requiring additional mapping by the user.
• ATOLL™ .xml files. These files can be imported directly without requiring additional mapping by the user.
• Ericsson Bulk CM files. These files can be imported directly without requiring additional mapping by the user.
• Text delimited files. Any text delimited file can be imported, although a first-time parameter mapping must be done by the user. Afterward, the mapping configuration can be saved and shared across multiple users for future import.
To import a text delimited network configuration file, the following procedures must be completed.
After you have done the configuration and clicked
Import, the task will be placed into the task queue for scheduling, and its status will be indicated in the
Task Window. After the data is imported, the imported data will be listed in
Data Explorer–Cells.4.24.2.1 Prepare Network Configuration File
The network configuration will be a text delimited file.
The file MUST contain the following network information:
• Cell site ID
• Cell site location
• Sector ID
• Sector location, if it differs from the cell site location
• Sector azimuth
The file should PREFERABLY contain the following information, as well:
• Cell site cluster
• Cell site type
• Sector antenna type
• Sector horizontal beamwidth
• Sector vertical beamwidth
• Sector antenna height
• Sector mechanical down tilt
• Sector electronic down tilt
• Sector neighbor list
For cdma2000, the PREFERRED carrier parameters are:
• PN offset
• Channel
• MCC
• SID
• NID
• BID
• Pilot channel power
• Synch channel power
• Paging channel power
• Maximum amplifier power(Watt)
• Pilot power fraction
• Non-pilot overhead power fraction
• Traffic power fraction
For EVDO, the PREFERRED carrier parameters are:
• PN offset
For GSM, the PREFERRED carrier parameters are:
• BCCH
• BSIC
• MCC
• MNC
• LAC
• CI
• Transmitter power
For WCDMA, the PREFERRED carrier parameters are:
• PSC
• UARFCN
• MCC
• MNC
• LAI
• RAI
• CPICH power
• Primary synch power
• Secondary synch power
• Traffic channel power
• Maximum amplifier power (Watt)
• Pilot power fraction
• Pilot overhead power fraction
• Traffic power fraction
For LTE, the PREFERRED carrier parameters are:
• PCI
• EARFCN
• MCC
• MNC
• CI
• TAC
Additional information, other than the information required/preferred above, can also be included in the file and imported into TEMS Discovery.
A sample of a network configuration file is shown below.
SiteNo | SectorID | Longitude | Latitude | Radius | Sector Width | Azimuth | Model | LAC | CI | Ant High | Terrain | Tilt | TYPE | BSIC | BCCH |
Site1 | Site1_O | 120.9445 | -40.88181 | 0.2 | 360 | 360 | Repeater | 16761 | 40422 | 62 | 0 | 0 | 0 | 60 | 85 |
Site12 | Site12_O | 120.9552 | -40.8872 | 0.2 | 360 | 360 | Repeater | 16761 | 40422 | 62 | 0 | 0 | 0 | 60 | 85 |
The format of longitude and latitude can also be like E 120.9445, N 40.88181, using N, S, E, or W instead of the + or – signs.
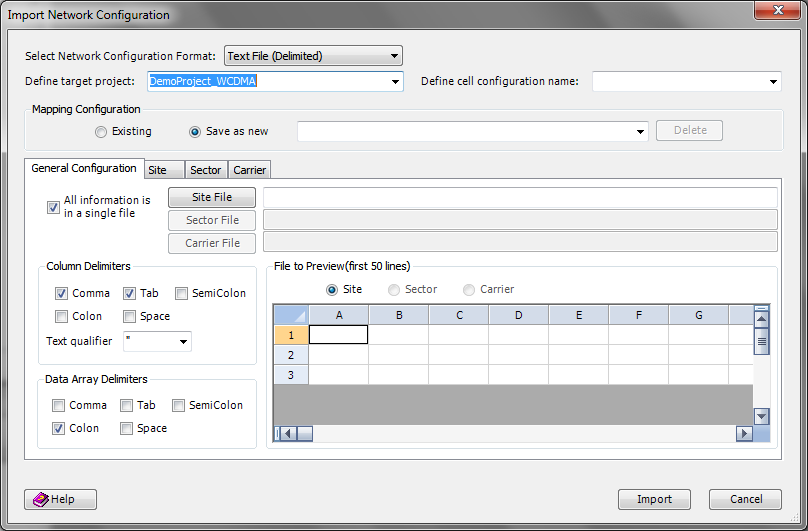
4.24.2.2 General Configuration
After the network configuration file is well formatted, you can start to define the column delimiters and create mapping between your source file and TEMS Discovery's internal parameters.
Target project and Scenario Name. To associate a new name to the network configuration, select or enter a new project name in Target Project, then select or enter a new scenario name in Scenario Name.
Mapping Configuration. The mapping can be saved as a mapping configuration that can be reused to import network configurations of the same data format.
There are two options:
• Existing. Select and apply an existing mapping configuration from the dropdown menu in the Mapping Configuration panel; changes made to the mapping configuration will be saved.
• Save as new. Build a new mapping configuration and save.
To delete any mapping configurations, select a mapping configuration from the dropdown menu and click Delete.
General Configuration. The network configurations can be contained in one file, or separated into several files. For example, one file can contain cell site information, another file can contain sector information, and a third file can contain carrier information. If multiple files are used for the network configuration, uncheck All information is in a single file, and click Site File, Sector File, and Carrier File to identify the corresponding file.
The preview spreadsheet displays the first 50 lines of the Site file. Select the correct column delimiter and data array delimited to preview the source file.
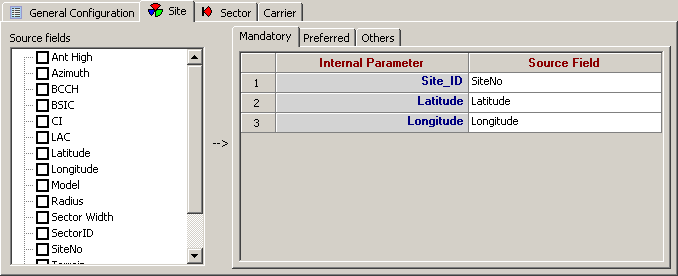
4.24.2.3 Create Mapping
Create mapping between source fields and TEMS Discovery's internal data structure by dragging-and-dropping a source field from the list into the spreadsheet on the right side.
When creating mapping, all of the parameters in the Mandatory spreadsheet must be mapped to the source field. Parameters in the Preferred spreadsheet are preferred, but not required; be aware that missing some preferred parameters could make certain TEMS Discovery functions unavailable. In Others, map any source field to a user-defined internal parameter; the user-defined parameters are primarily used for display purposes.
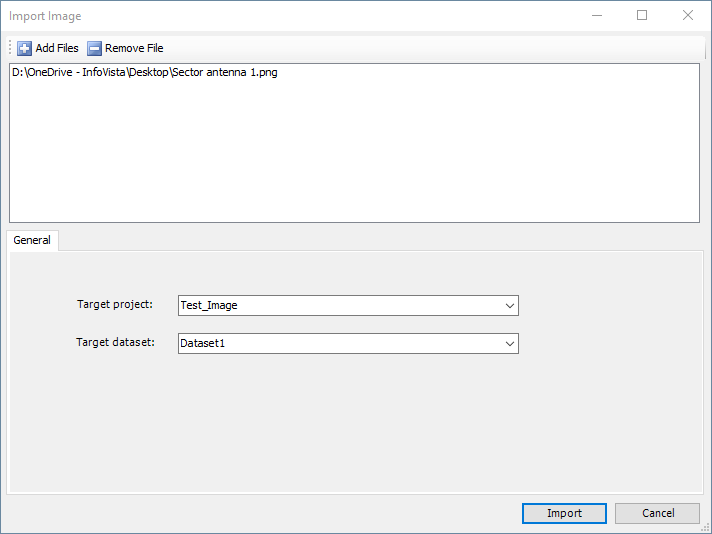
4.24.3 Import Image Data
TEMS Discovery can import image files of .jpg, .bmp, .png, .tif format. Drive test related images (e.g. SSV speed test screen shots, network equipment pictures, etc.) may be browsed and displayed in
Image View and included in user-defined
report output.
Import Image dialog can be accessed in the following ways:
• Selecting Import | Import Image from the File menu on the Main Window.
• Clicking the
Import Image 
button in the Main Window toolbar.
Target project and dataset can either be selected from the existing projects and datasets, or new ones can be created by typing in new names. Image importing tasks for each of specified image files will be placed into the task queue for scheduling by clicking the Import button, with their status indicated in the
Task Window. After image data is imported, imported images will be listed in the
Image tab of the Data Explorer.
.
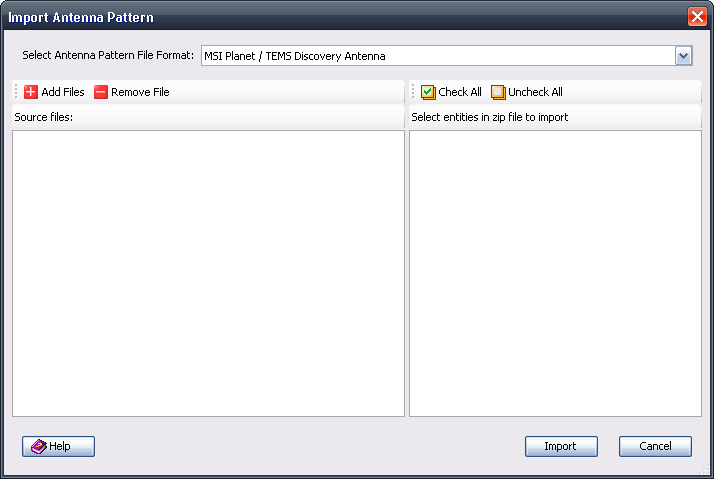
4.24.4 Import Antenna Data
If the Network Configuration contains Antenna_Type as a parameter of the Sector table, TEMS Discovery can provide a view for the antenna pattern of a sector.
The Import Antenna Pattern dialog can be accessed in the following ways:
• Selecting Import | Import Antenna from the File menu on the Main Window.
• Clicking the
Import Data button in the Main Window toolbar.
After you have selected the files and clicked the Import button, the task will be placed into the task queue for scheduling and its status will be indicated in the
Task Window. After the data is imported, the imported file will be displayed in the
Antenna Pattern Viewer, and can be assigned to a sector parameter in the
Cell Configuration Editor.
A sample MSI Planet/TEMS Discovery Antenna file is shown below.
NAME 420
FREQUENCY 455
H_WIDTH 360
V_WIDTH 7
FRONT_TO_BACK 0
TILT ELECTRICAL
gain 9.2 dBI
Polarization VERTICAL
Comment
HORIZONTAL 360
0 0.2
1 0.2
2 0.2
...
353 0.2
354 0.2
355 0.2
356 0.2
357 0.2
358 0.2
359 0.2
VERTICAL 360
0 0
1 0.5
2 1.4
3 2.6
....
354 8.2
355 5.1
356 2.9
357 1.4
358 0.5
359 0
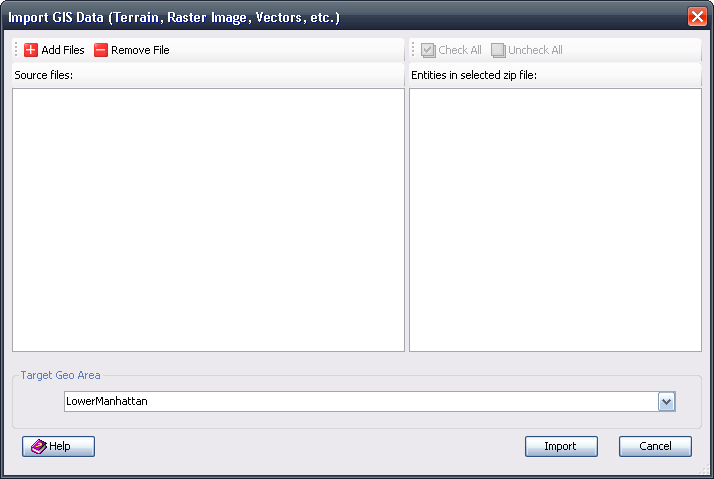
4.24.5 Import GIS Data
The Import GIS Data dialog can be accessed in the following ways:
• Selecting Import | Import GIS from the File menu on the Main Window.
• Clicking the
Data Import button
in the Main Window toolbar.
• Clicking the
Import GIS button

in the
Walk-U-Through wizard toolbar.
You can select multiple GIS data files in various formats, then select or enter a new geo folder in the field, and click
Import. The import task will be placed into the task queue for scheduling, and its status will be indicated in the
Task Window. After the data is imported, the imported data will be listed in the
GIS List and the
GIS/Coverage Map tab in the Data Explorer.
As a reference, the following is a partial list of spatial data products and formats that can be imported into TEMS Discovery. However, it is strongly recommended to attempt import of any GIS data, even if it is not known whether that format is supported.
• USGS Digital Line Graph, Optional Format (DLG-O)
• USGS Digital Line Graph, Spatial Data Transfer Standard Format (DLG/SDTS)
• USGS Digital Elevation Model (DEM)
• USGS Digital Elevation Model, Spatial Data Transfer Standard Format (DEM/SDTS)
• USGS Digital Elevation Model, GeoTIFF Format
• USGS Digital Raster Graphic (DRG)
• USGS Digital Orthophoto Quads (DOQ), Native USGS Format
• USGS Digital Orthophoto Quads (DOQ), GeoTIFF Format
• USGS Digital Orthophoto Quads (DOQ), JPG w/ Native Header Format
• USGS Geographic Names Information System (GNIS)
• USGS Land Use and Land Cover Data (LULC)
• USGS National Elevation Dataset (NED) - ArcGrid, BIL, Grid Float Format
• Global 30-arc-second Digital Elevation Data (GTOPO30)
• NOAA DSDATA Geodetic Control, SDTS Format
• NOAA TerrainBase Elevation Data
• Canadian Digital Elevation Data (CDED)
• JPEG Image with World File
• PNG Image with World File
• AutoCAD DXF (Drawing Interchange File)
• ESRI Shapefiles
• Surfer Grid (ASCII and Binary) Format Files
• Canada 3D Files
• International Bathymetric Chart of the Arctic Ocean (IBCAO) Files
• Global 2' Elevation Data (ETOPO2)
• GLOBE (Global Land 1-km Base Elevation) Data
• Arc/Info ASCII Grid
• Arc/Info Binary Grid
• LizardTech MrSID Data
• Arc/Info Export Format (E00)
• ERMapper Compressed Wavelet (ECW) Format
• ERDAS Imagine Image Format
• DTED (Digital Terrain Elevation Data) Format
• MapInfo MIF/MID and TAB/MAP Formats
• NIMA GNS (GeoNet Names Server) Format
• Terragen Terrain Format
• MicroStation DGN Format
• SRTM (Shuttle Radar Topography Mission)
• BIL/BSQ/BIP/RAW Imagery
• ASTER DEM and L1A/L1B Imagery and MODIS imagery
• BSB Nautical Charts
• MapTech Topo Maps and Aerial Navigation Charts
• MapTech Nautical Charts (PCX Format)
• TIGER/Line Files
• ADRG Files
• ASRP (Arc Standard Raster Product) and USRP Files
• CADRG and CIB Files
• VPF (VMAP0, VMAP1, DNC) Files
• S-57 Digital Chart Files
• JPEG2000 Files
• Erdas GIS/LAN Files
• GIF Files
• NOS/Geo Chart Files
• Garmin PCX5 Format Waypoint (WPT), Route (RTE), and Track (TRK) Files
• OziExplorer Waypoint (WPT), Route (RTE), and Track (PLT) Files
• GPX (GPS eXchange Format) Files
• Zmap Plus Grid Files
• DBF (DBase III+) Files
• BT (Binary Terrain) Elevation Grid Files
• GXF (Geosoft ASCII Grid) Files
• Geosoft Binary Grid Files
• ASPRS LIDAR LAS Files
• Hypack Matrix Files
• Marplot MIE Files
• DHM - Swiss DEM Files
• Lowrance USR
• GPS TrackMaker
• Landsat 7A FAST Format
• NTF Grid/Contour Format
• TerraScan .bin/.ts Format
• Idrisi Format
• Japanese DEM (JDEM) Format
• SEGP1/UKOOA Seismic Shotpoint Format
• CompeGPS RTE, TRK, and WPT Formats
• KMZ Formats
• Lowrance SonarViewer Format
• NITF - National Imagery Transmission Format
• Geodas Grid (GRD98) Format
• Intergraph COT Format
• CDF (GES Cartographic Data Format)
• Platte River ASCII Digitizer Format
• AutoCAD DWG (DraWinG) File
• WAsP .MAP Format
• PGM Grayscale Grid Format
• SMT KINGDOM Software Planimetric Polygon Format
• Polish MP (cGPSMapper) Format
• GML (Geography Markup Language) Format
• DMDF (Digital Map Data Format) Format
• EMF (Windows Enhanced Metafile) Format
• PCX Files
• RIK (Swedish Topo Map) Files
• MPR/MPH (German Topo Map) Files
• OCAD .OCD Files
• HF2/HFZ Files
• PLS-CADD XYZ Files
• OpenStreetMap (OSM) Files
• TomTom OV2 Files
• Vulcan3D Triangulation (.00t) Files
• Delft3D (LDB) Files
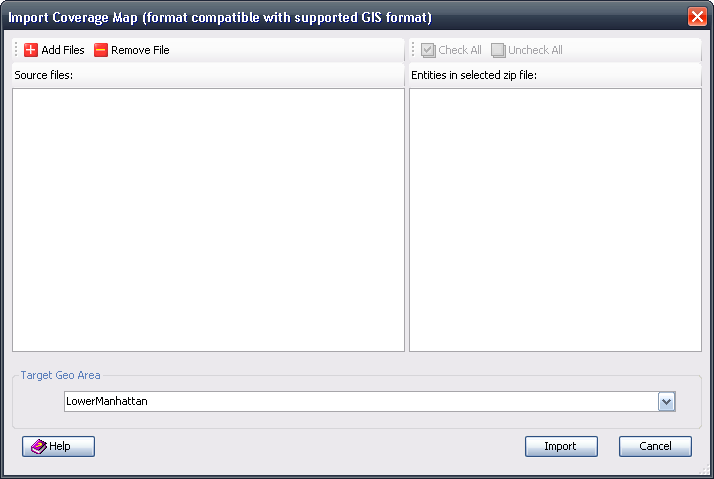
4.24.6 Import Coverage Map
Coverage maps exported from external planning tools can be imported into TEMS Discovery.
The procedure for importing a coverage map is similar to that of importing GIS data.
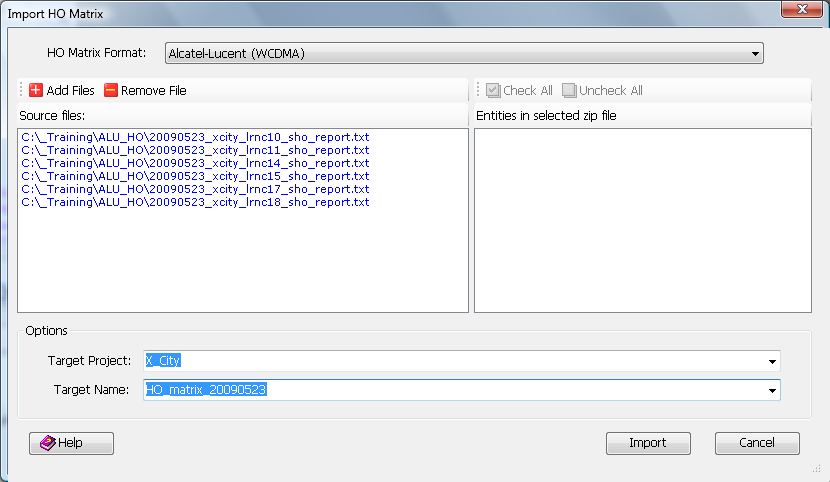
4.24.7 Import HO Matrix
TEMS Discovery can import Handover (HO) matrices. Based on the HO matrices, TEMS Discovery can use the
Neighbor List Analyzer to perform neighbor list analysis and eventually export a
Neighbor List Work Order.
The HO Matrix formats supported include those from Huawei and Alcatel-Lucent WCDMA networks. The support for other formats from other equipment vendors can be added upon request. Please
contact our customer support or sales team if you have additional questions.