48.4.2 Loading GPX-format Planned Routes or Tracks into the Map Window
To load a GPX-format planned route into TEMS Investigation, follow the steps below.
If the file does not contain a planned route but instead holds a track resulting from an actual test drive, then the track will be used as planned route. (The term "route" alone is mostly used in the following for the sake of brevity.)
From the File menu, choose Options, then choose Recording in the left-hand pane.
Under Planned route path, browse to the directory where your planned routes are stored and select the appropriate file.
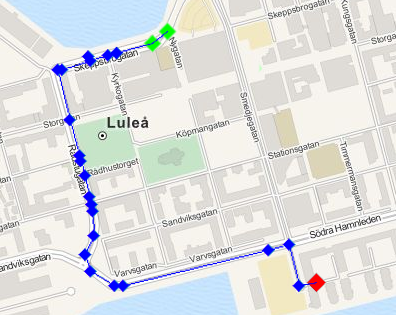
The route will now appear in the Map window1, plotted as diamond-shaped markers connected by straight lines. The first two markers are drawn in green, and the final marker is drawn in red. An example is shown below. The actual path taken by the vehicle will be tracked in the usual manner by means of an information element theme and its route markers (see section "Presenting Information Elements"; no such markers appear in the screenshot that follows).
The route is imported into the Map window as a separate theme, placed in a special Planned Route map layer; see section "Presentation of GPX-format Planned Routes".
A planned route (or track) loaded in this way will also be saved with any logfile (*.trp) that you record from now on. Once a GPX route or track has been saved in a TRP logfile, you can load it back into TEMS Investigation on a later occasion by pointing to that logfile under Planned route path (see above) rather than to the GPX file itself. Compare section "Further Recording Options".
Note that GPX-format planned routes, intended for outdoor drive testing, are unrelated to the indoor planned routes that you can create in the Pinpoint Window. (The latter are dealt with in section "Creating Planned Routes".)