52.28.7 How to set up TEMS Dialer
52.28.7.1. Installing TEMS Dialer
Start TEMS Investigation on the device to update to the latest version of ODM2 (and download the
Start a PowerShell or CMD shell and run the adb install command with the path to the apk:

For example type:
'C:\Program Files (x86)\TEMS\TEMS Investigation 20\Application\adb.exe' install 'C:\ProgramData\TEMS\TEMS Investigation 20\Update\ODM\ODM2\Dialer.apk' <return>
(You can cut and paste this command string.)
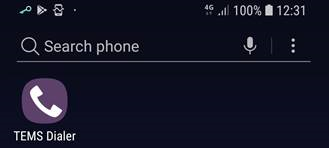
Run the application to install it on the phone..
The first thing you will see is an explanation of why you should accept the next few requests:

Tap OK and you will see the storage permission request:
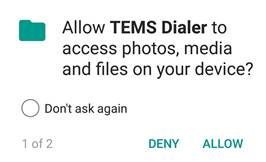
Tap the Don't ask again option and then Allow.
This will display the phone calls permission request:
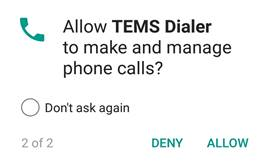
Tap the Don't ask again option and then Allow.
This will display the change default calling app request:
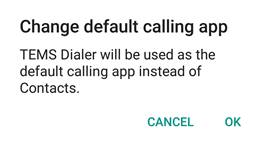
Tap OK to approve of the change and finish installing the TEMS Dialer app on this device.
52.28.7.2. Restoring the default dialer
To return to using the default dialer (whether temporarily or permanently):
Select Settings > Apps on the phone
Tap the 3 dots (More) button
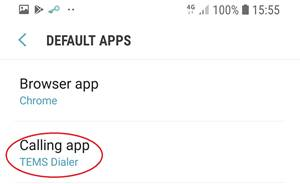
Select Default apps:

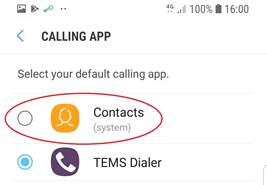
Select Calling app:
Select Contacts as the default calling app and grant the permissions:
52.28.7.3. Restoring the TEMS Dialer
To return to using the TEMS Dialer again (after using the default dialer):
Select Settings > Apps on the phone
Tap the 3 dots (More) button
Select Default apps
Select Calling app
Select TEMS Dialer as the default calling app and grant the permissions