4.4 SQL Server Setup
4.4.1 Prerequisite
TEMS Discovery Enterprise Database Mode uses SQL Server database for storing measurement data and SQL Server Analysis Services for statistics data. SQL Server Database engine supports Windows Authentication and SQL Server Authentication but SQL Server Analysis Services only support Windows Authentication. It is recommended to use Windows Authentication for TEMS Discovery Enterprise.
If TEMS Discovery Enterprise and SQL Server are installed in two separate machines, both machines should be part of same domain. Create a domain account and use it for SQL Server administration and data processing.
Archiving of log files in SQL Server Standard Edition is supported for databases created with TDE version 26.1.0 or newer. For more information on archiving of log files refer to section 4.3.6.
4.4.2 Installation
4.4.2.1 SQL Server 2022
1. Run SQL Server setup and click on the ‘Installation’ and select ‘New installation or add features to an existing installation’.
2. Continue to follow on screen installation instructions and install all prerequisite and required files. Once successful SQL Server 2022 will start. Click on the ‘New installation or add shared features’ button.
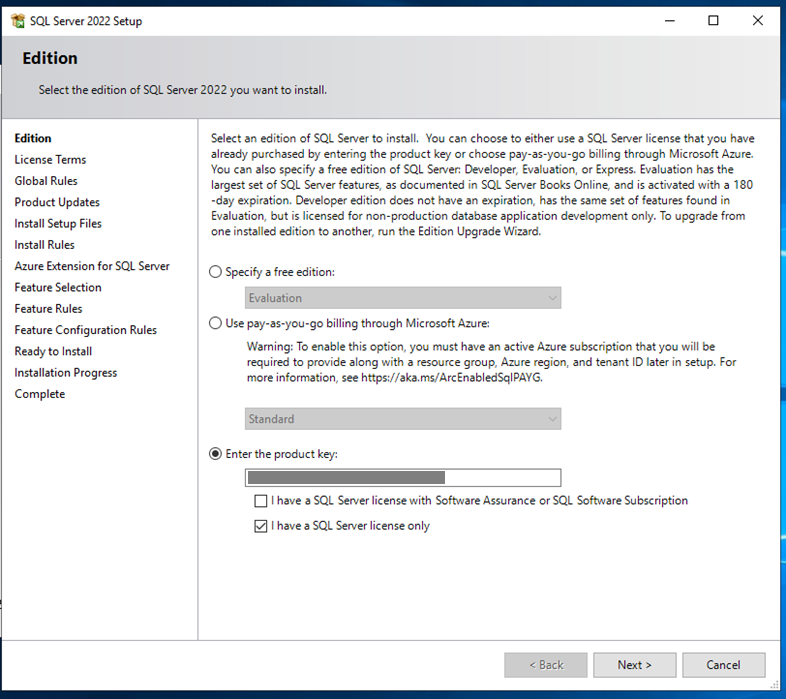
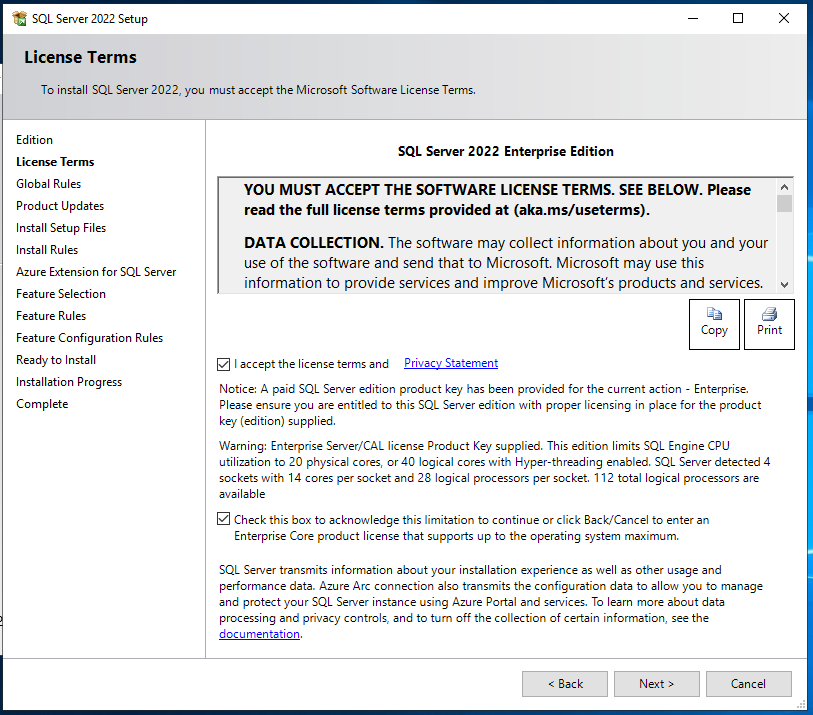
3. Click next, enter product key and accept licensing agreement. Click next, tick “I accept the license terms”. Click next.
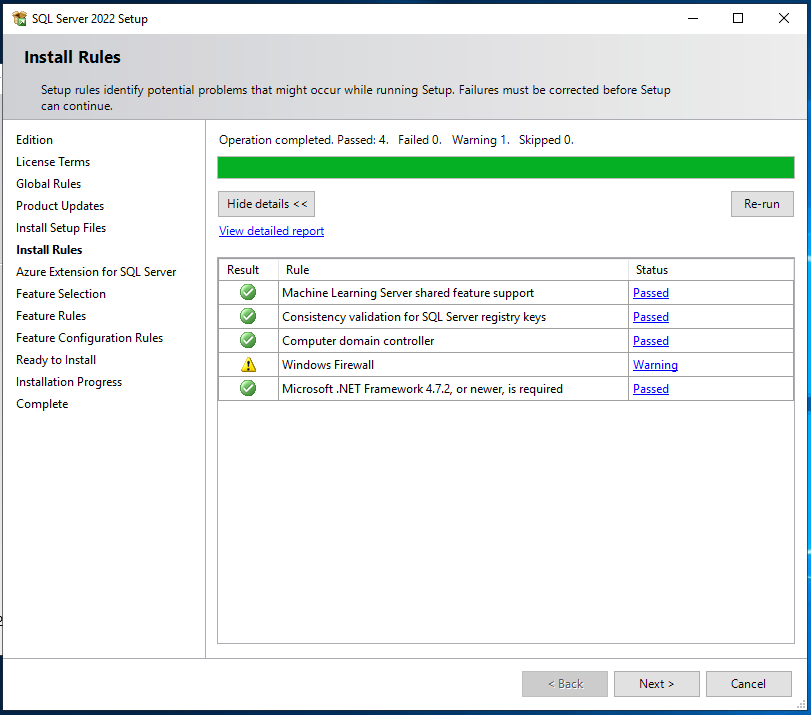
4. Complete ‘Install Rules’ step and rectify any issues in order to continue installation.
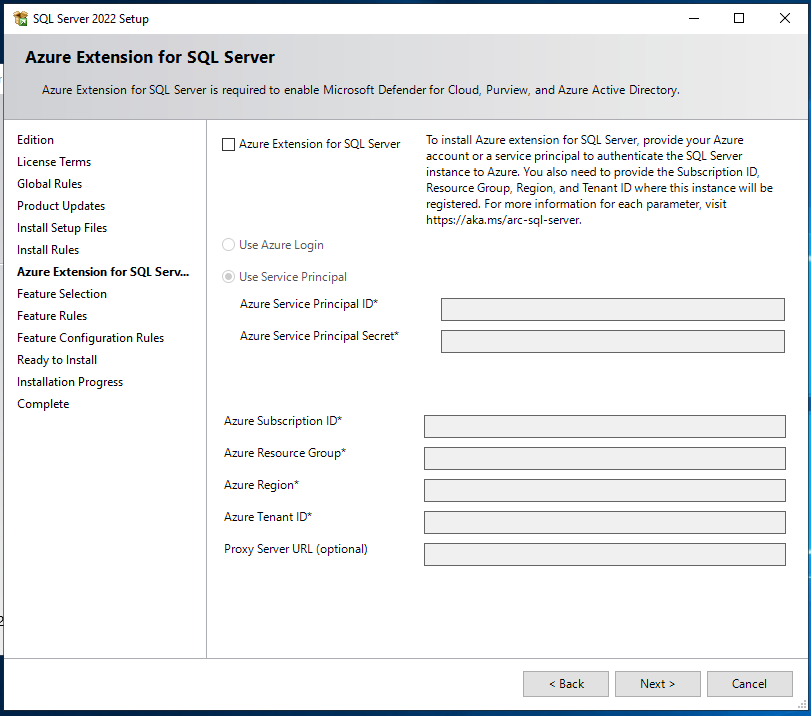
5. Complete ‘Azure Extension for SQL Server’ step with ‘Use Server Principal’
6. Click next and go to ‘Feature Selection’ screen and select ‘Database Engine Services’ and ‘Analysis Services’ as below.
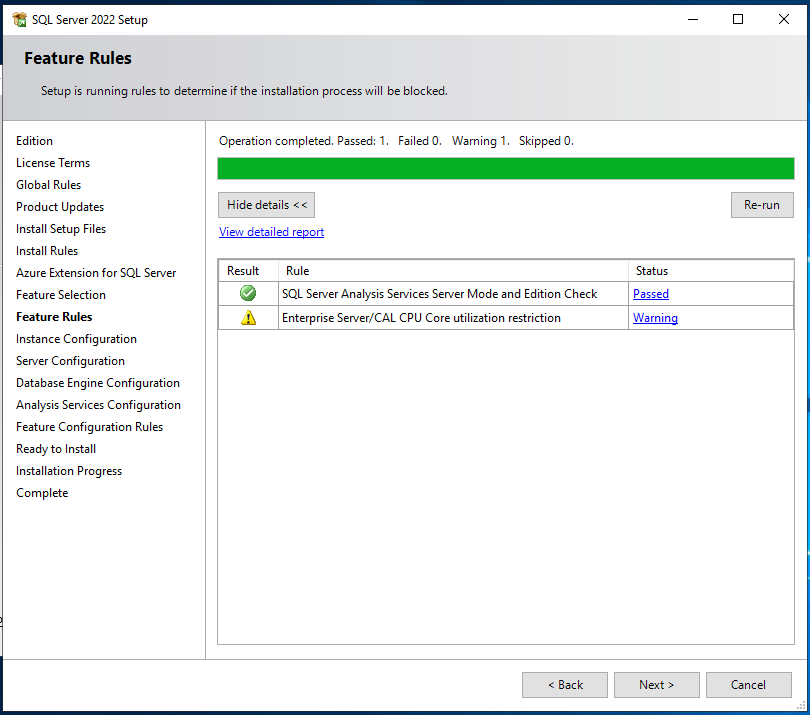
7. Complete ‘Feature Rules’ step and rectify any issues in order to continue installation.
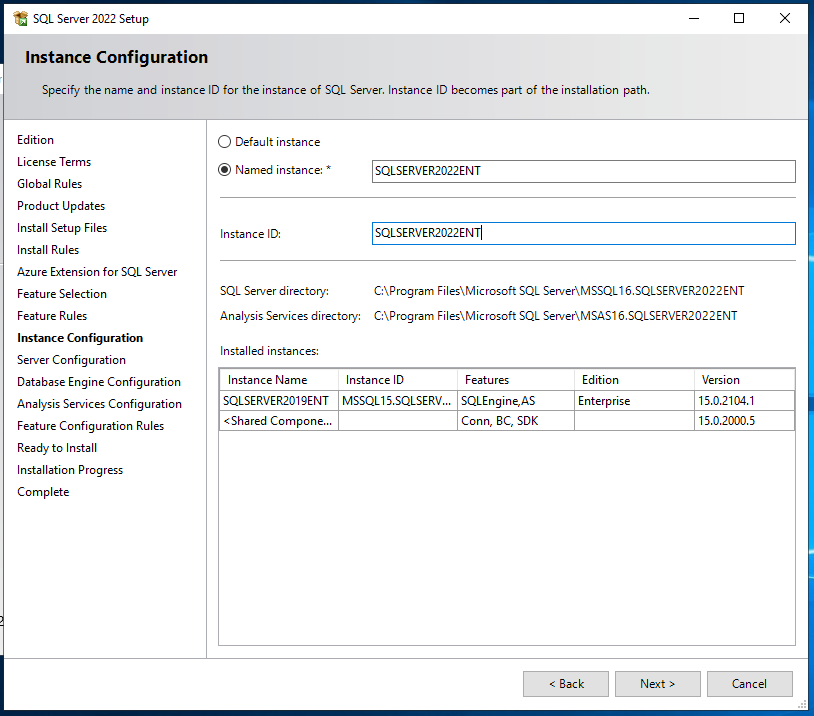
8. In the ‘Instance Configuration’ step, select SQL instance. If you choose named instance, specify instance name.
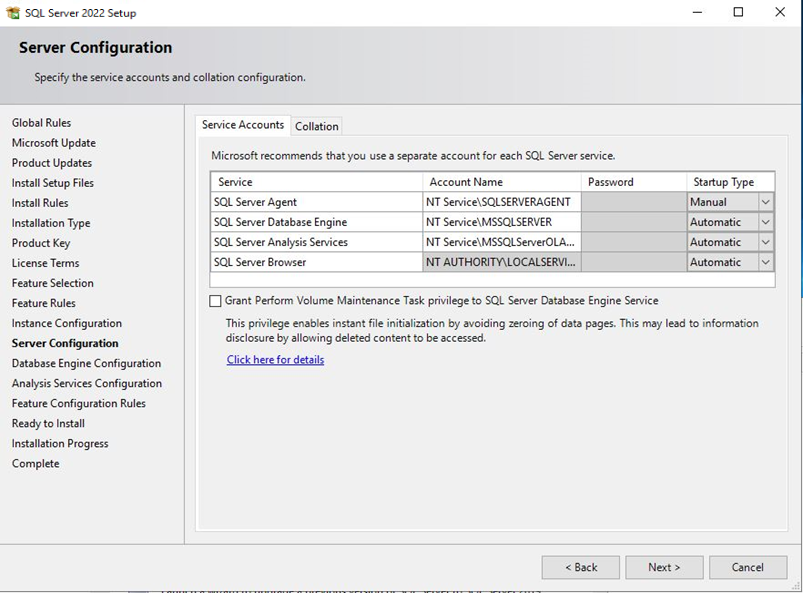
9. Click next and go to ‘Server Configuration’ screen. Select an account to run SQL Server services. Use your company’s security policy in selection account name. If the SQL Server machine is only accessible within company’s intranet you may select ‘NT AUTHORITY\SYSTEM account. This account has full access to all resources in the local machine. If you use other account make sure this account has full access to all database drives used by this instance of SQL Server.
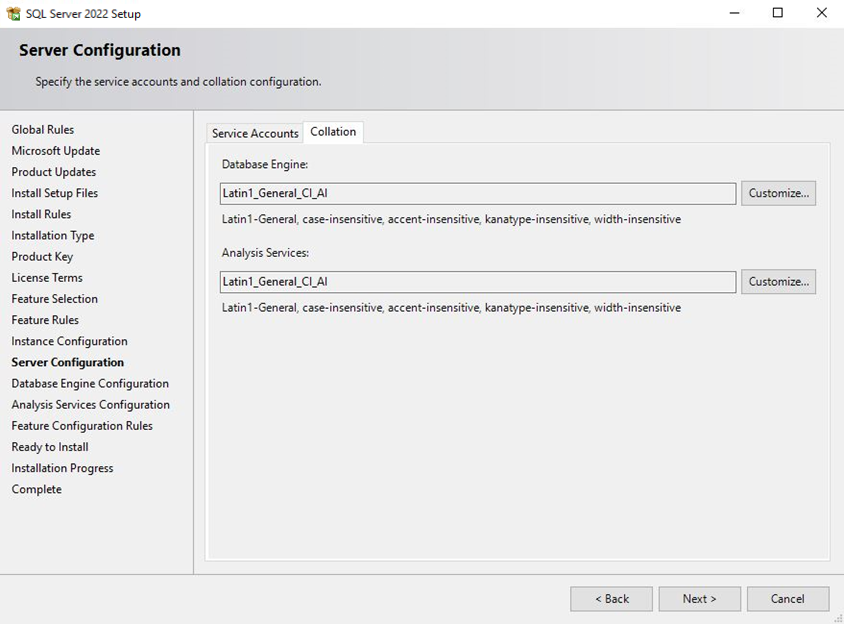
10. Click on the ‘Collation’ tab and make sure they are same as follows.
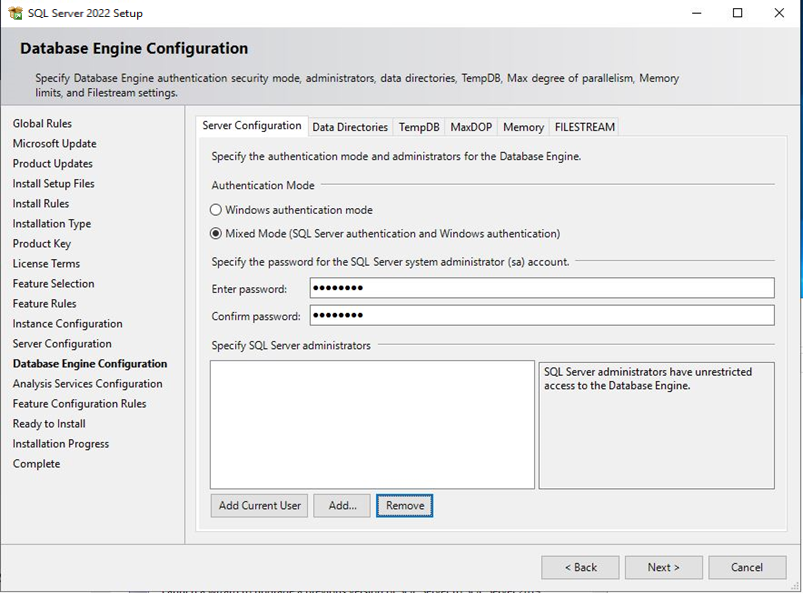
11. Click Next and Go to ‘Database Engine Configuration’ screen. Select ‘Mixed Mode’ and provide a strong password for ‘sa’ account. Add the user created in section 4.4.1 as administrator.
12. Click on ‘Data Directories’ and use the drives created in section 2.2.1.4 for various database directories as follows.
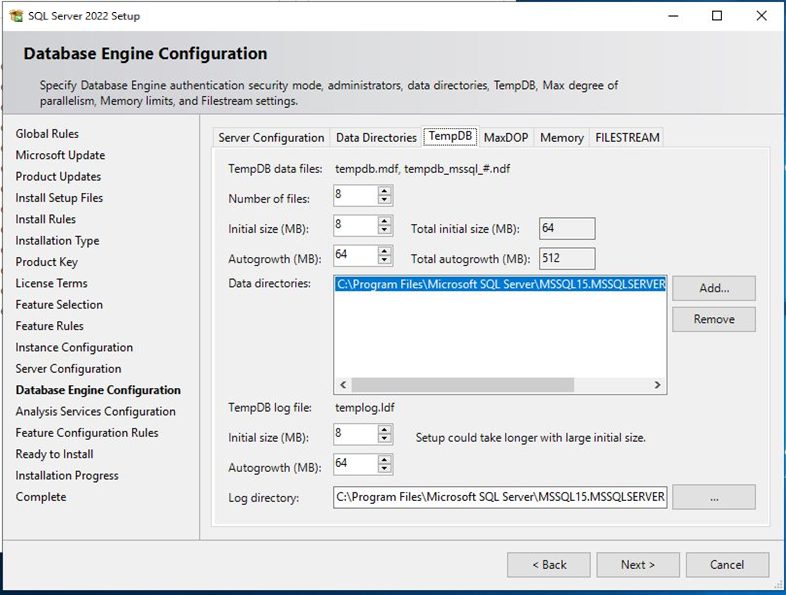
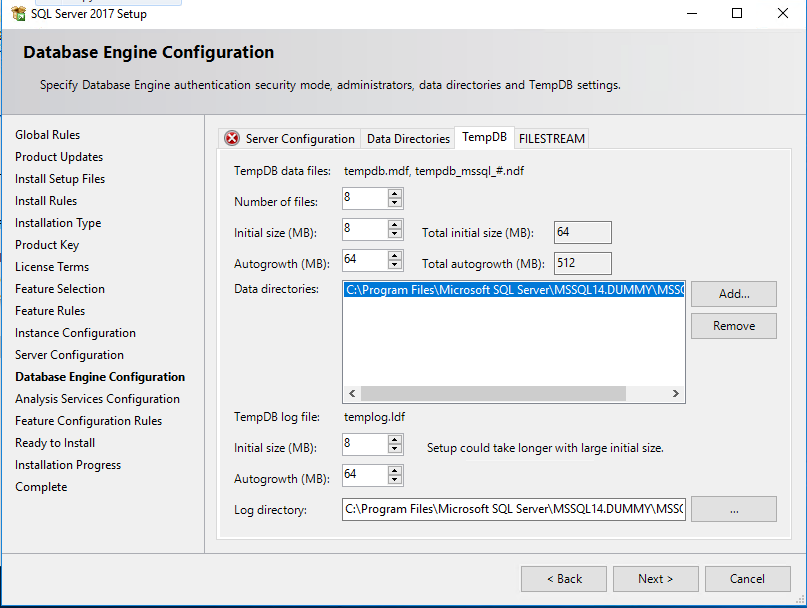
13. Click on the ‘TempDB’ tab and enter the TempDB settings (dependent on your system configuration). For more details, see 4.4.
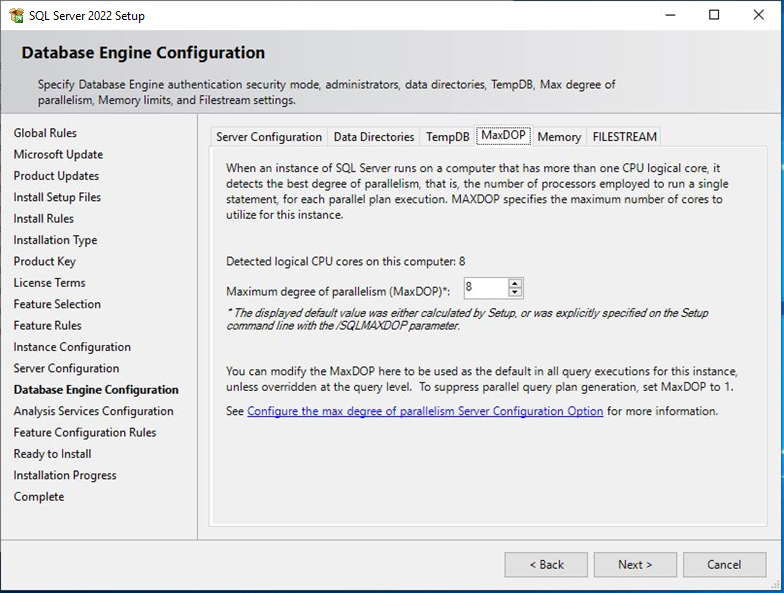
14. Click on the MaxDOP tab and enter the required settings. It should be populated by default which depends on the maximum number of cores that is available in the machine.
15. Click on the Memory tab and enter the required settings. It should be pre-selected as Default which is calculated by the Setup based on your system configuration.
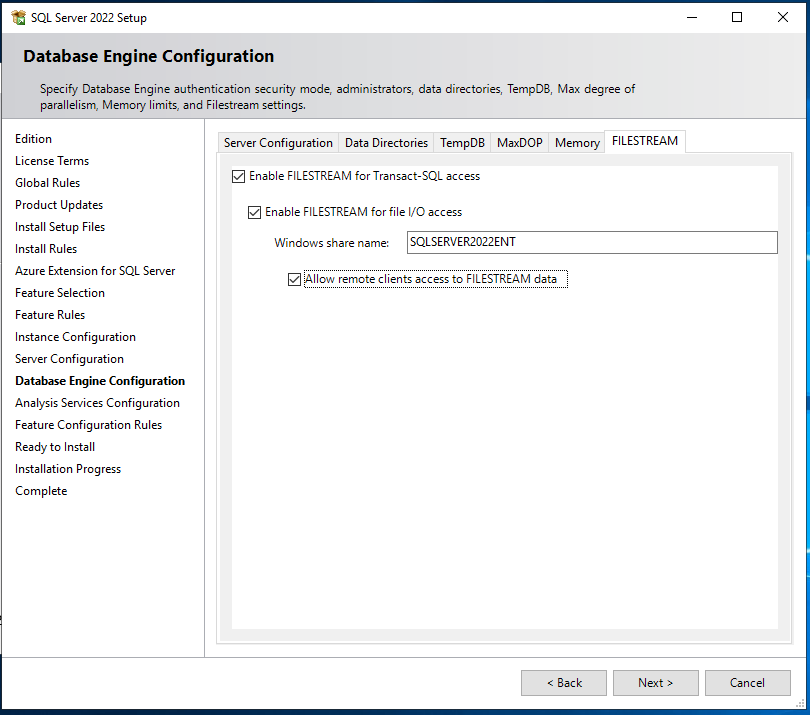
16. Click on the ‘FILESTREAM’ tab and check all and also give a windows share name (default same as SQL Server instance name).
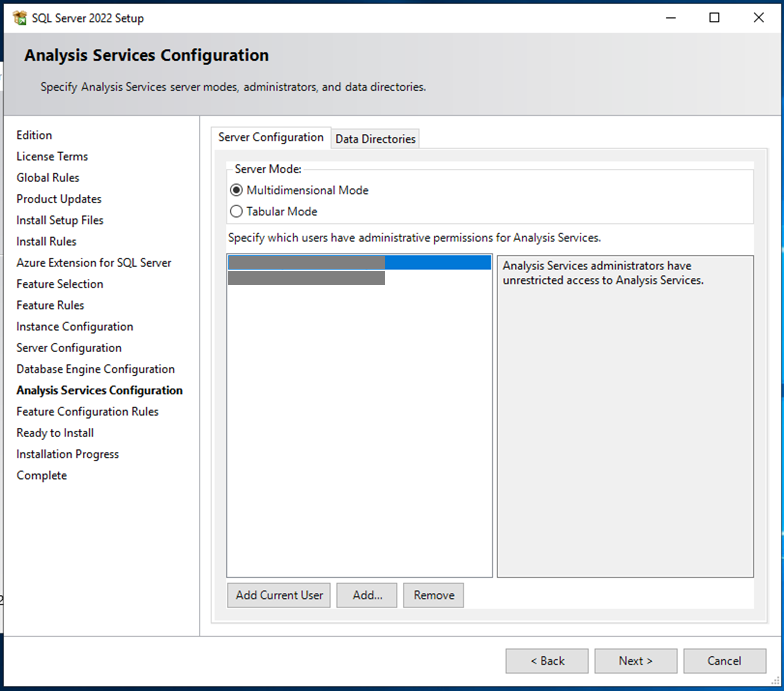
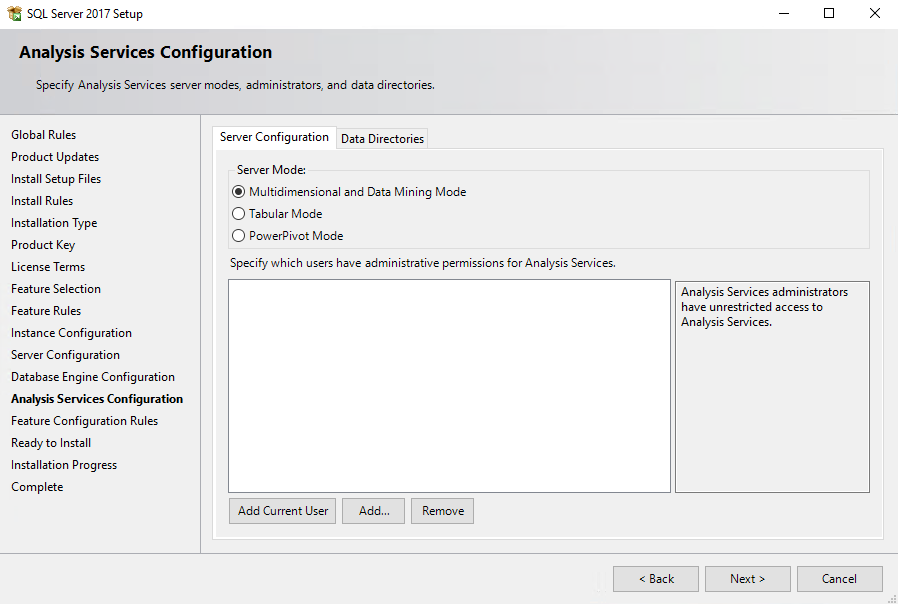
17. Click next and go to ‘Analysis Services Configuration’ page. Select ‘Multidimensional and Data Mining Mode’. Add the user created in section 4.4.1 as administrative user.
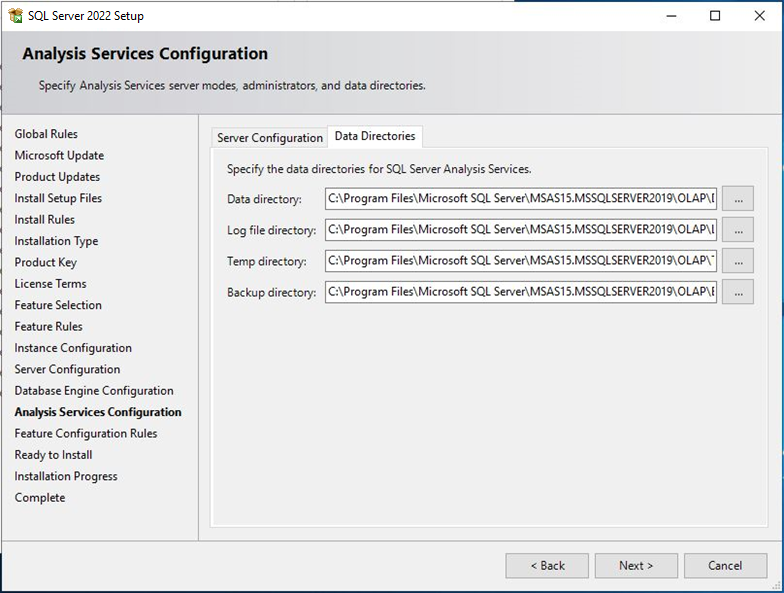
18. Click on the ‘data Directories’ tab and provide appropriate folders for data, log, temp and backup. Click next and complete the installation.
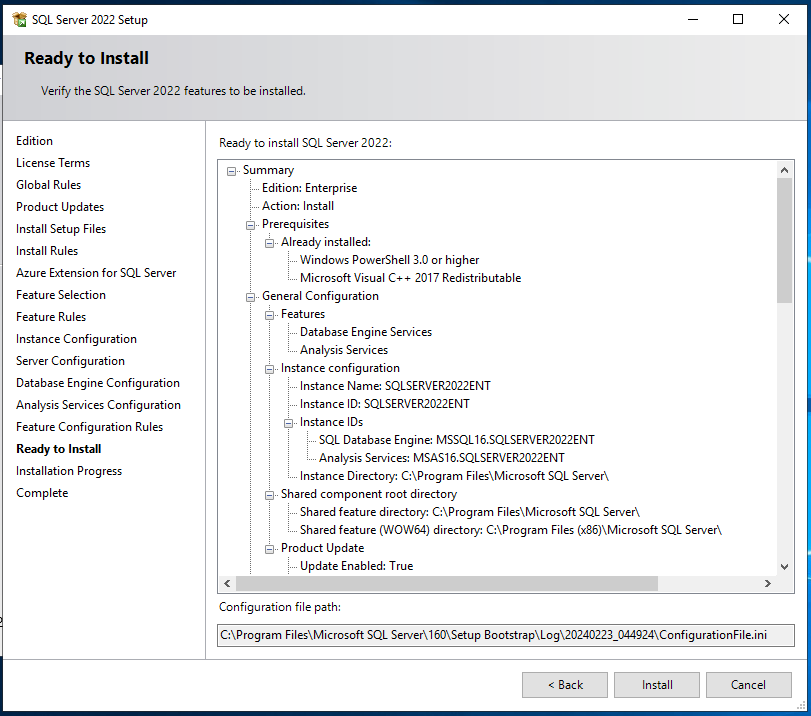
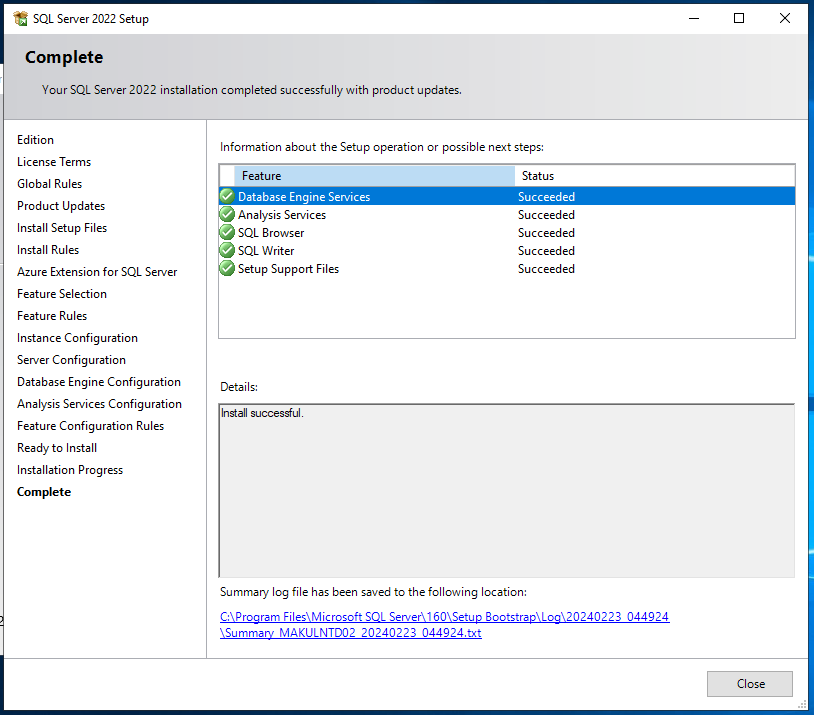
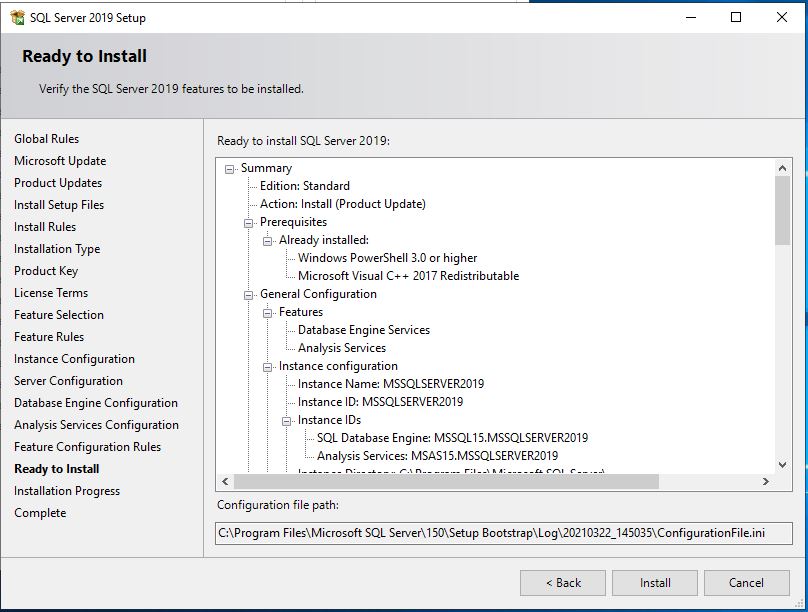
19. Click next and Check the summary in Ready to Install ensuring that all of the configurations are correctly selected. If so, press the Install button to proceed with the installation and click on Close after it is completed.
4.4.2.2 SQL Server 2019
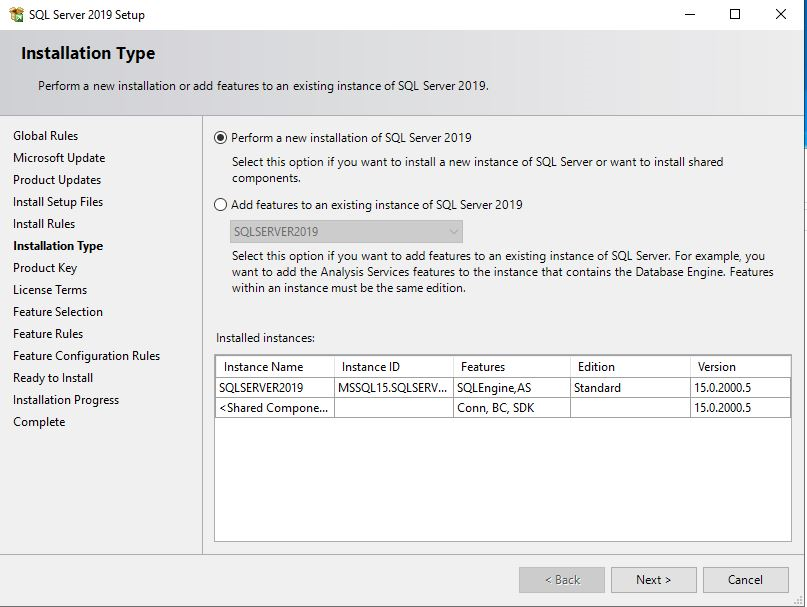
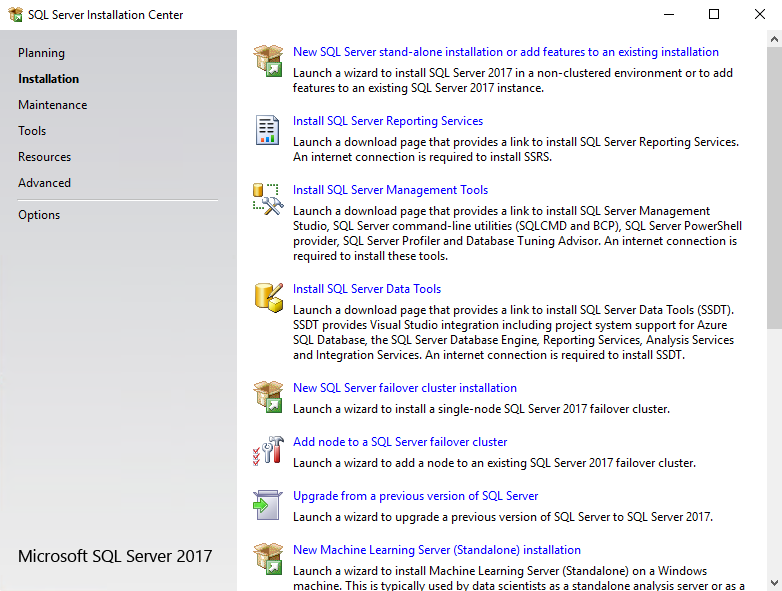
1. Run SQL Server setup and click on the ‘Installation’ and select ‘New installation or add features to an existing installation’.
2. Continue to follow on screen installation instructions and install all prerequisite and required files. Once successful SQL Server 2019 will start. Click on the ‘New installation or add shared features’ button.
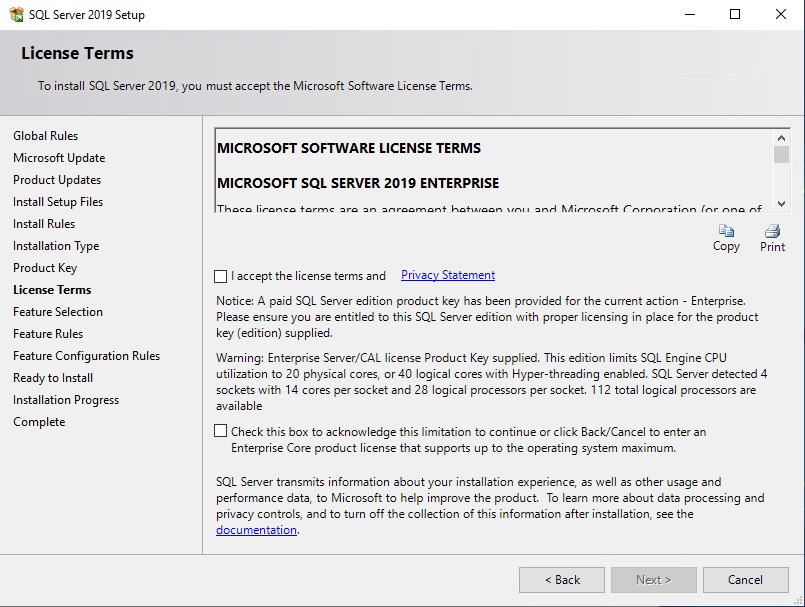
3. Click next, enter product key and accept licensing agreement. Click next, tick “I accept the license terms”. Click next.
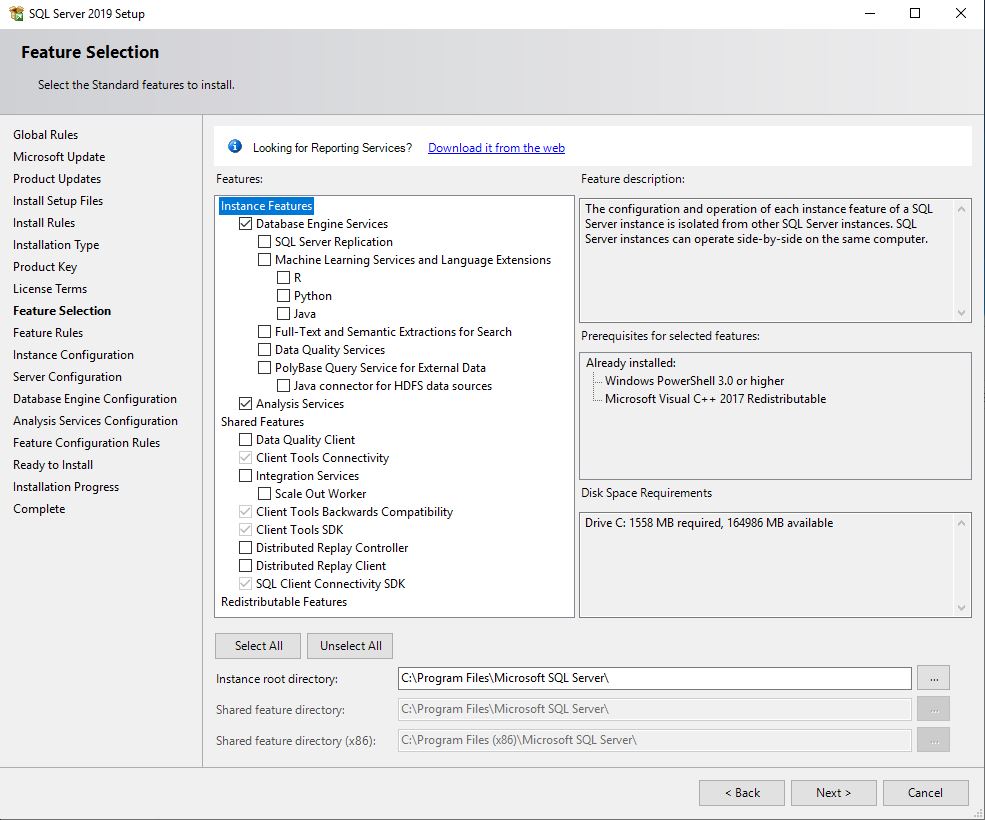
4. Click next and go to ‘Feature Selection’ screen. Select ‘Database Engine Services’ and ‘Analysis Services’ and the Shared Features as below.
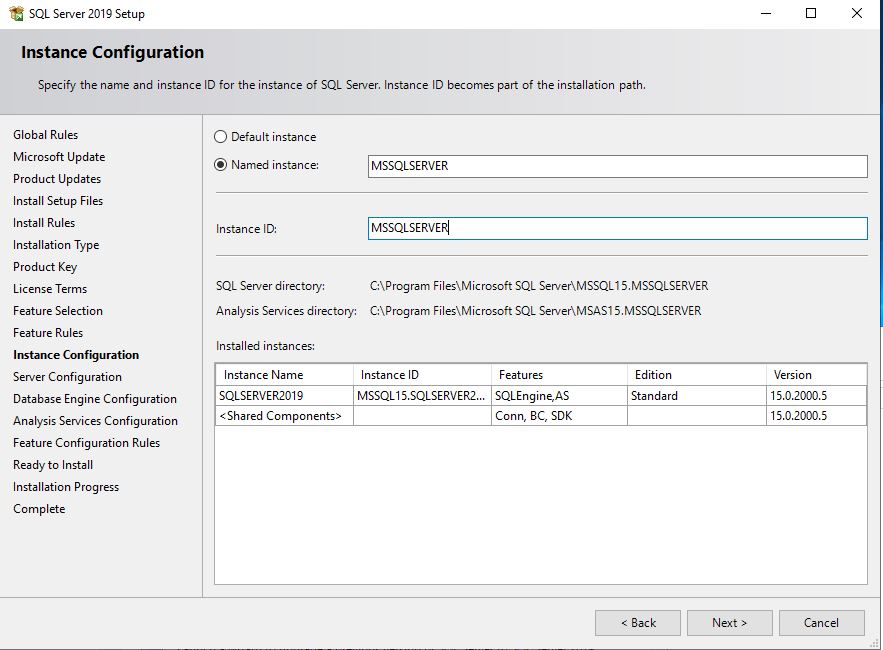
5. In the ‘Instance Configuration’ screen choose ‘Default instance’. If you choose named instance, give a instance name.
6. Click next and go to ‘Server Configuration’ screen. Select an account to run SQL Server services. Use your company’s security policy in selection account name. If the SQL Server machine is only accessible within company’s intranet you may select ‘NT AUTHORITY\SYSTEM account. This account has full access to all resources in the local machine. If you use other account make sure this account has full access to all database drives used by this instance of SQL Server.
7. Click on the ‘Collation’ tab and make sure they are same as follows.
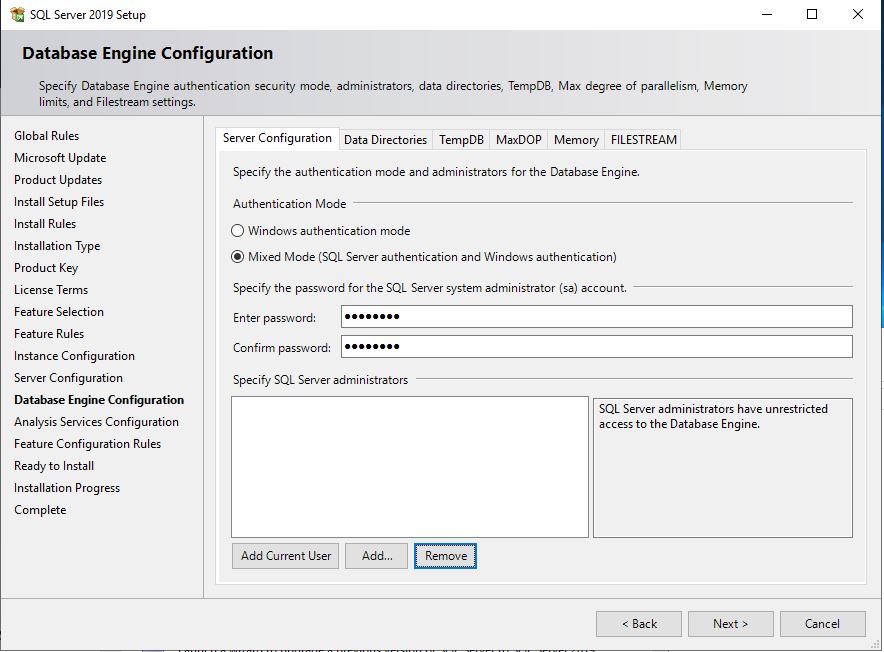
8. Click Next and Go to ‘Database Engine Configuration’ screen. Select ‘Mixed Mode’ and provide a strong password for ‘sa’ account. Add the user created in section 4.4.1 as administrator.
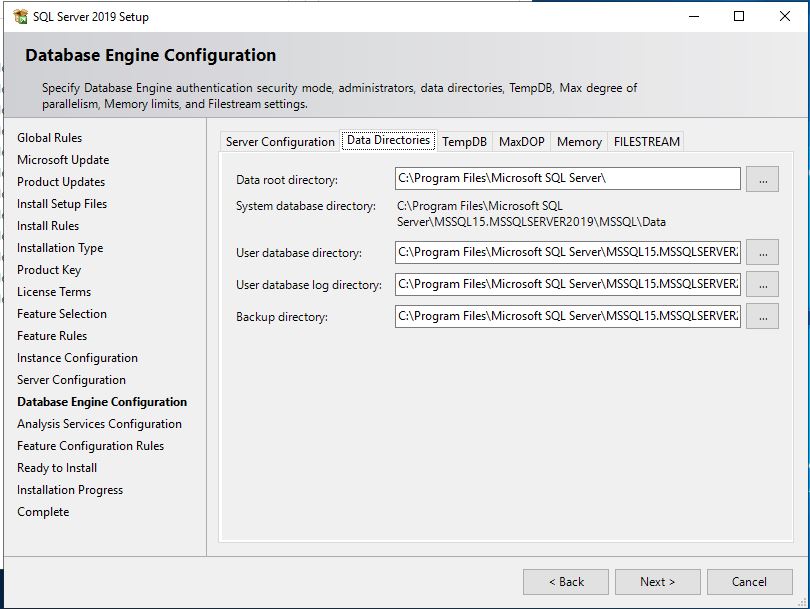
9. Click on ‘Data Directories’ and use the drives created in section 2.2.1.4 for various database directories as follows.
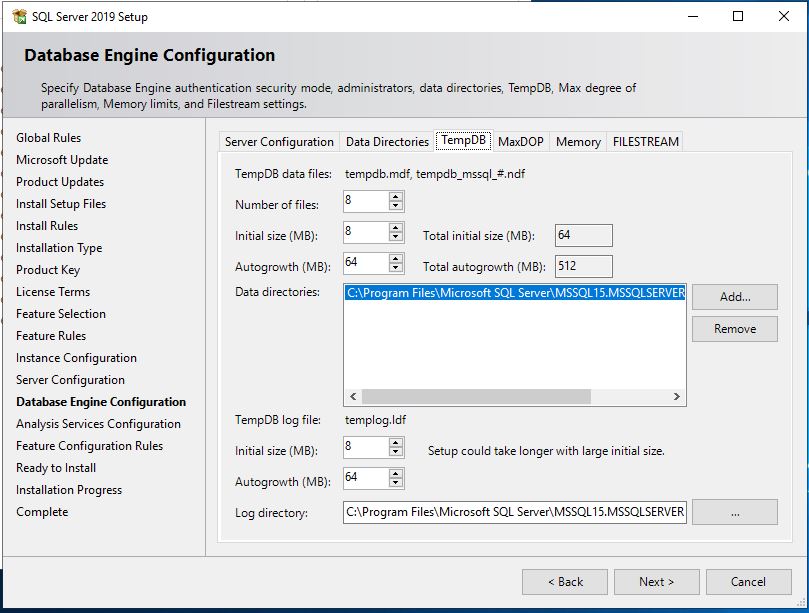
10. Click on the ‘TempDB’ tab and enter the TempDB settings (dependent on your system configuration). For more details, see 4.4.
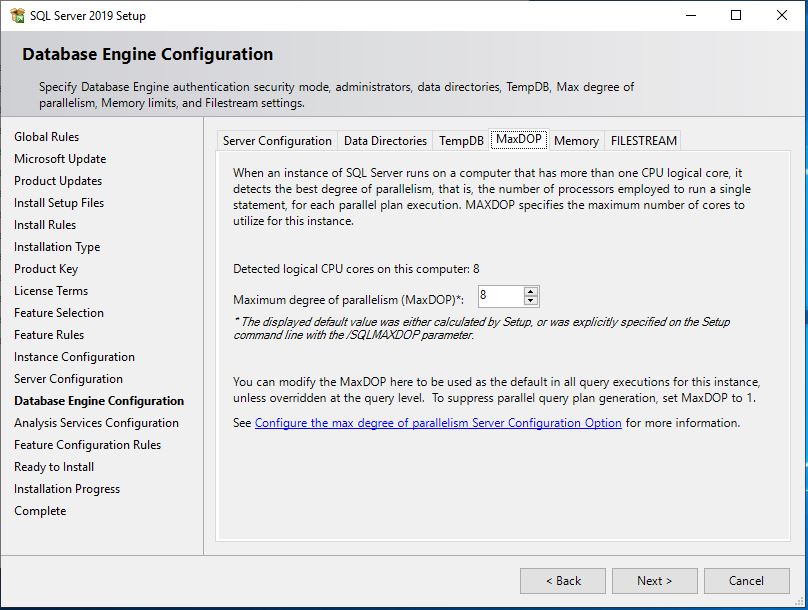
11. Click on the MaxDOP tab and enter the required settings. It should be populated by default which depends on the maximum number of cores that is available in the machine.
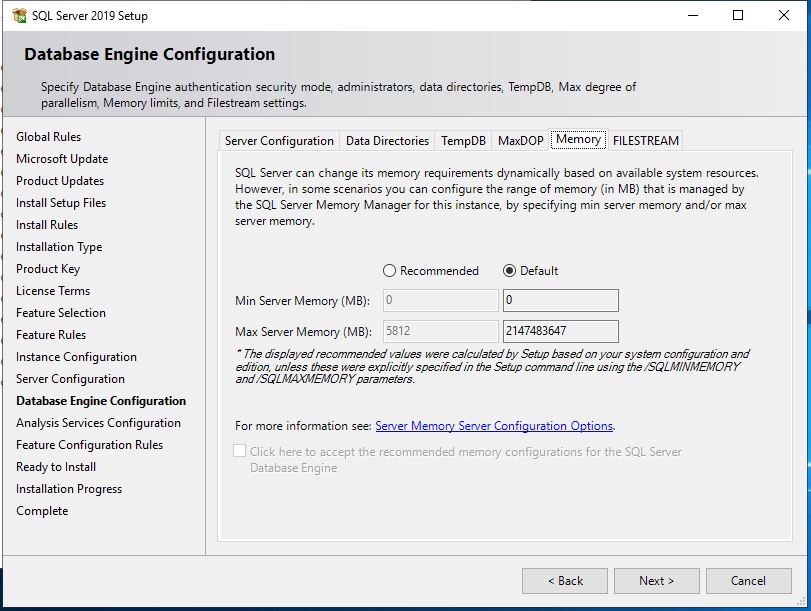
12. Click on the Memory tab and enter the required settings. It should be pre-selected as Default which is calculated by the Setup based on your system configuration.
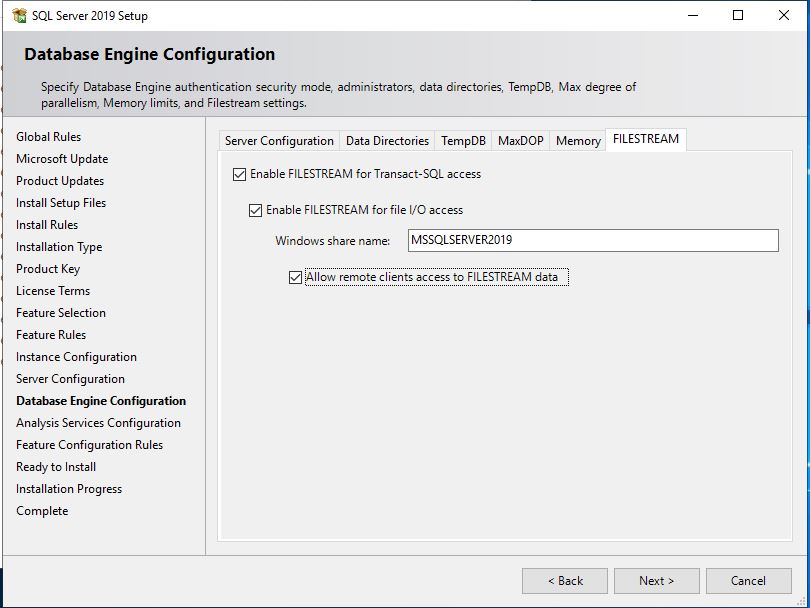
13. Click on the ‘FILESTREAM’ tab and check all and also give a windows share name (default same as SQL Server instance name).
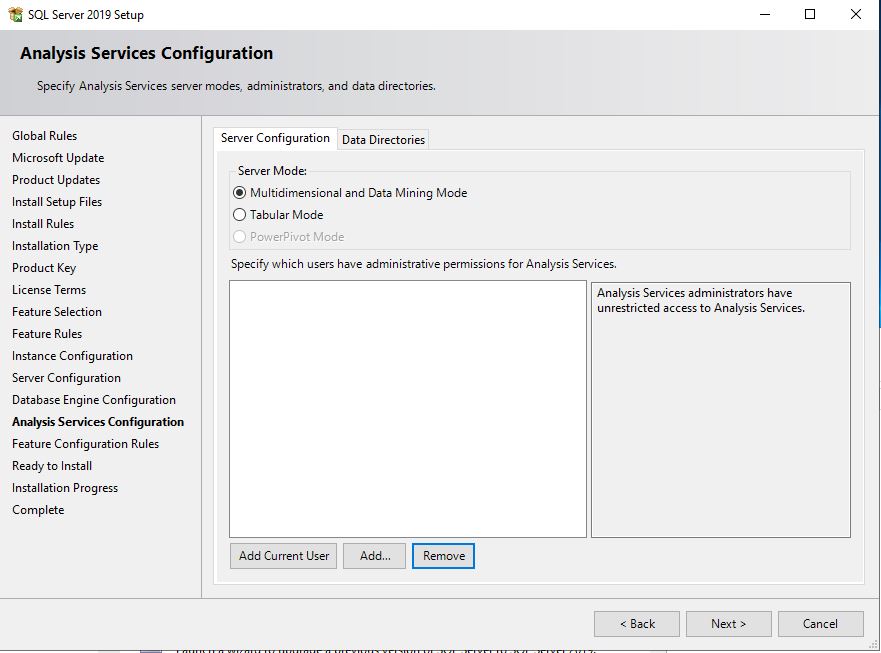
14. Click next and go to ‘Analysis Services Configuration’ page. Select ‘Multidimensional and Data Mining Mode’. Add the user created in section 4.4.1 as administrative user.
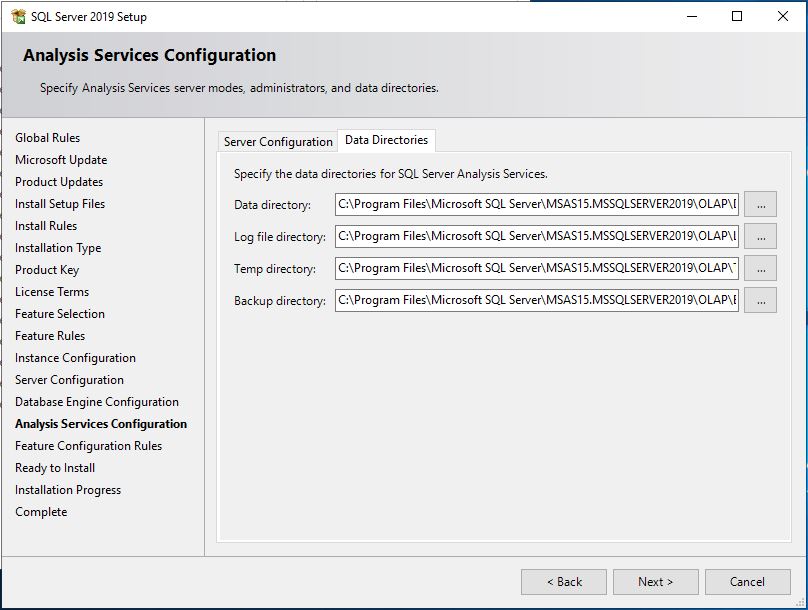
15. Click on the ‘data Directories’ tab and provide appropriate folders for data, log, temp and backup. Click next and complete the installation.
16. Click next and Check the summary in Ready to Install ensuring that all of the configurations are correctly selected. If so, press the Install button to proceed with the installation.
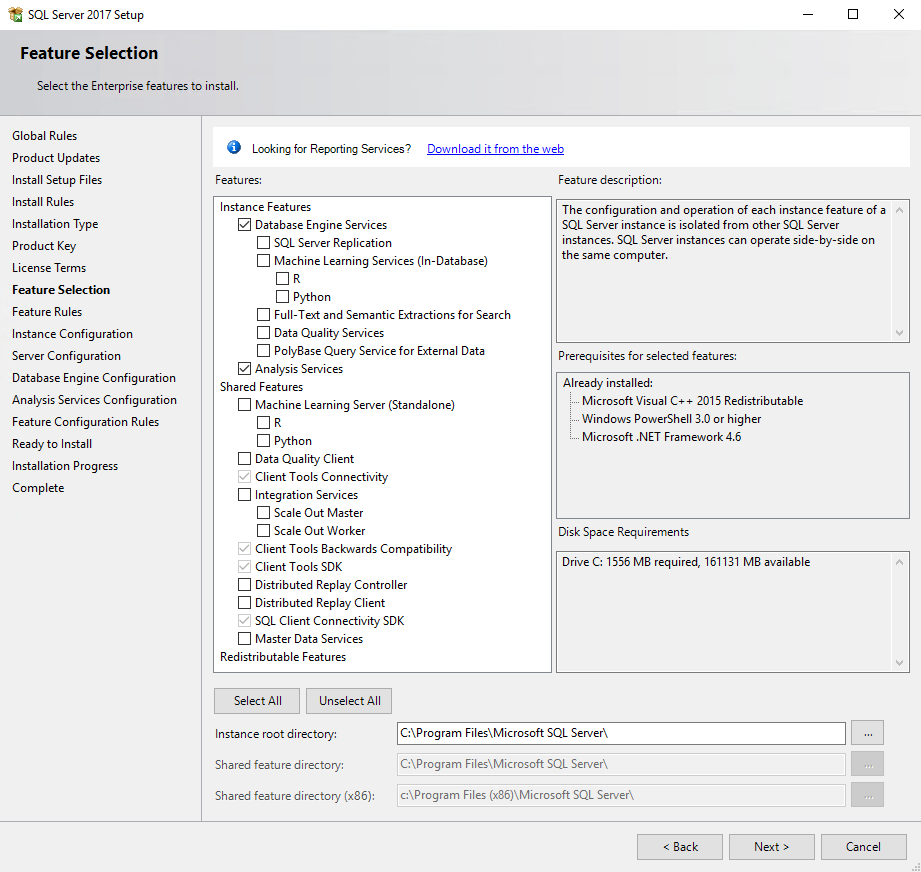
4.4.2.3 SQL Server 2017
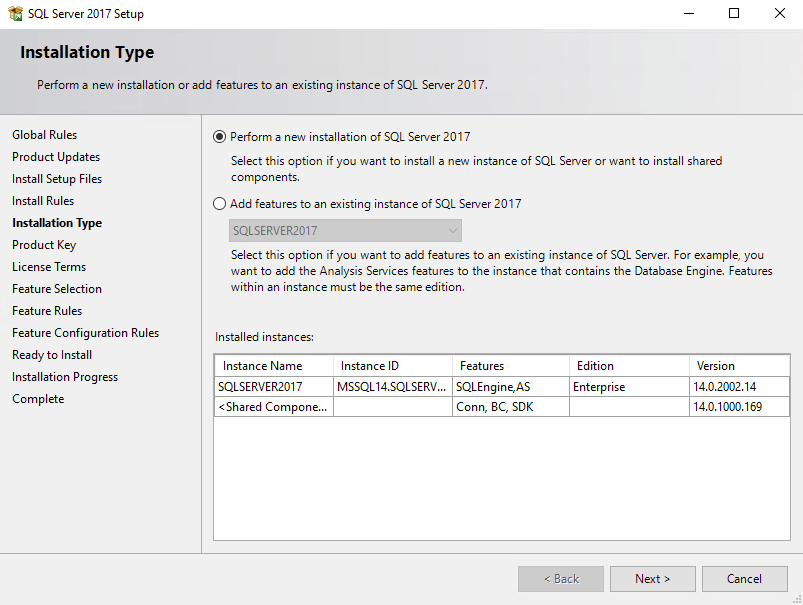
1. Run SQL Server setup and click on the ‘Installation’ and select ‘New installation or add features to an existing installation’.
2. Continue to follow on screen installation instructions and install all prerequisite and required files. Once successful SQL Server 2017 will start. Click on the ‘New installation or add shared features’ button.
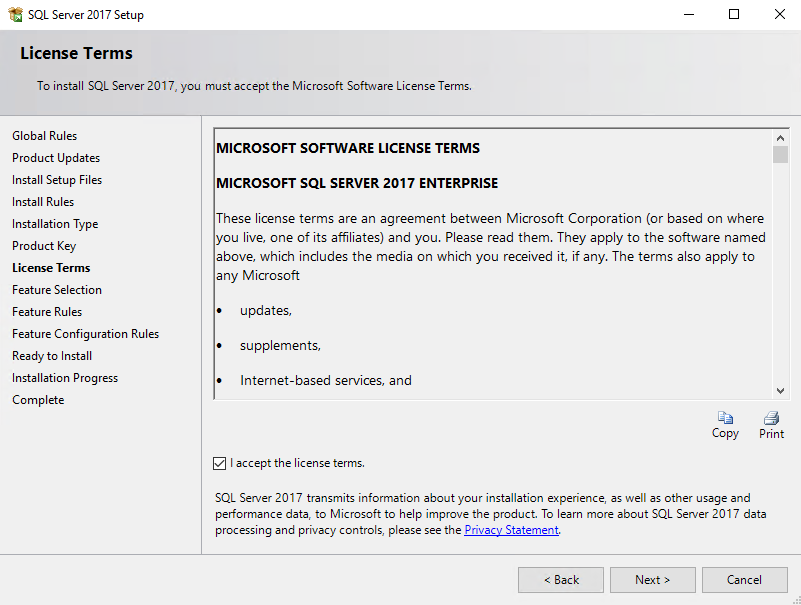
3. Click next, enter product key and accept licensing agreement. Click next, tick “I accept the license terms”. Click next.
4. Click next and go to ‘Feature Selection’ screen. Select ‘Database Engine Services’ and ‘Analysis Services’ and the Shared Features as below.
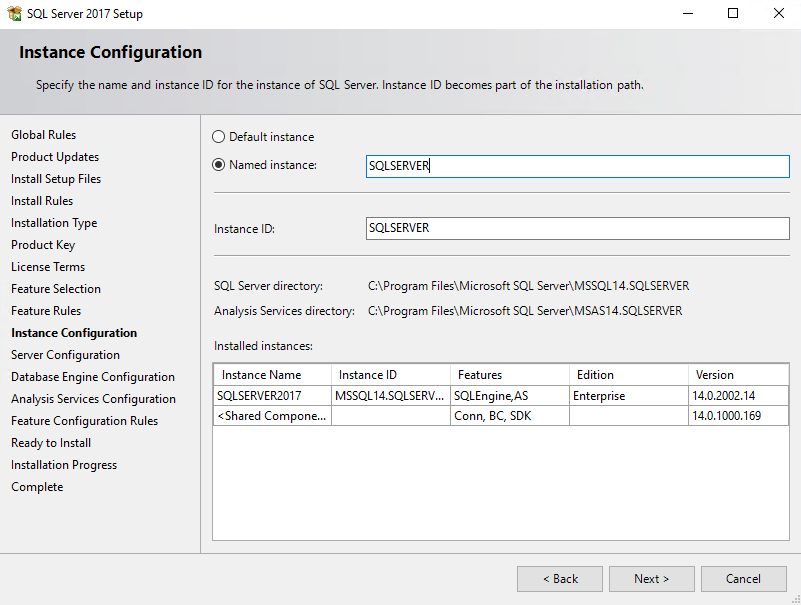
5. In the ‘Instance Configuration’ screen choose ‘Default instance’. If you choose named instance, give a instance name.
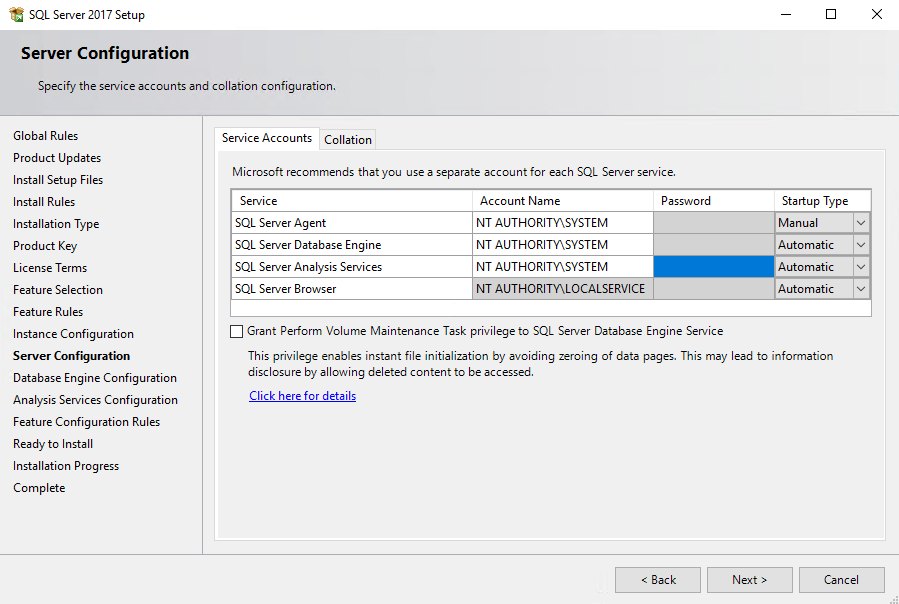
6. Click next and go to ‘Server Configuration’ screen. Select an account to run SQL Server services. Use your company’s security policy in selection account name. If the SQL Server machine is only accessible within company’s intranet you may select ‘NT AUTHORITY\SYSTEM account. This account has full access to all resources in the local machine. If you use other account make sure this account has full access to all database drives used by this instance of SQL Server.
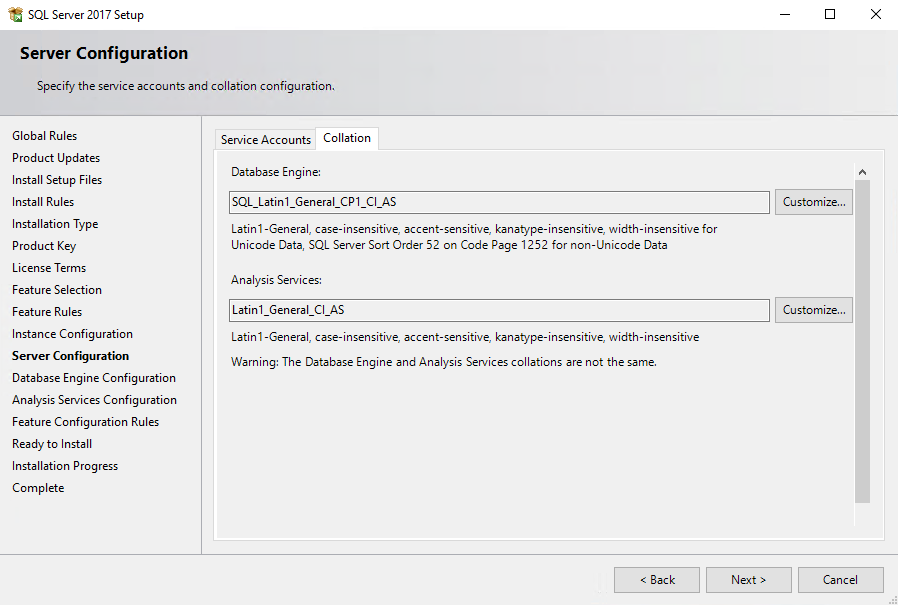
7. Click on the ‘Collation’ tab and make sure they are same as follows.
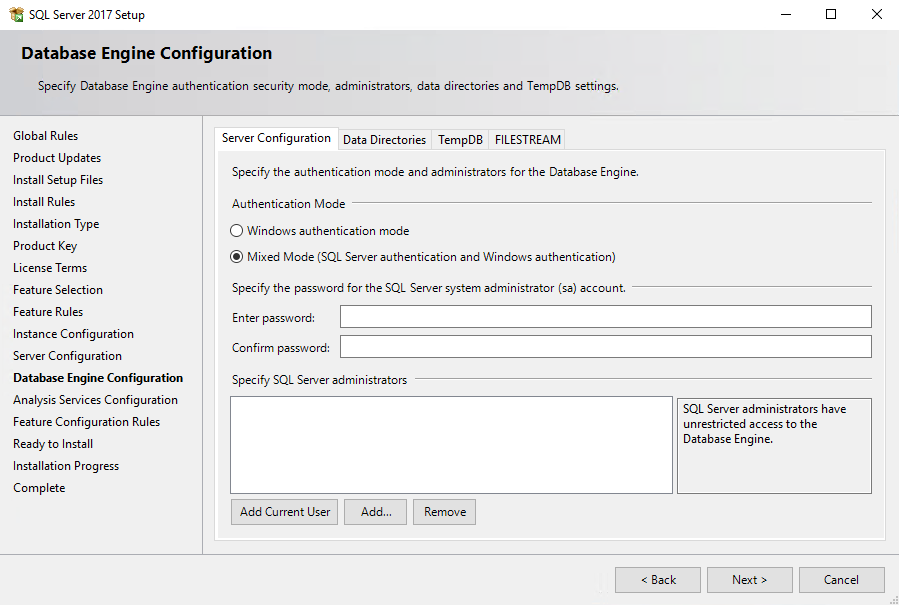
8. Click Next and Go to ‘Database Engine Configuration’ screen. Select ‘Mixed Mode’ and provide a strong password for ‘sa’ account. Add the user created in section 4.4.1 as administrator.
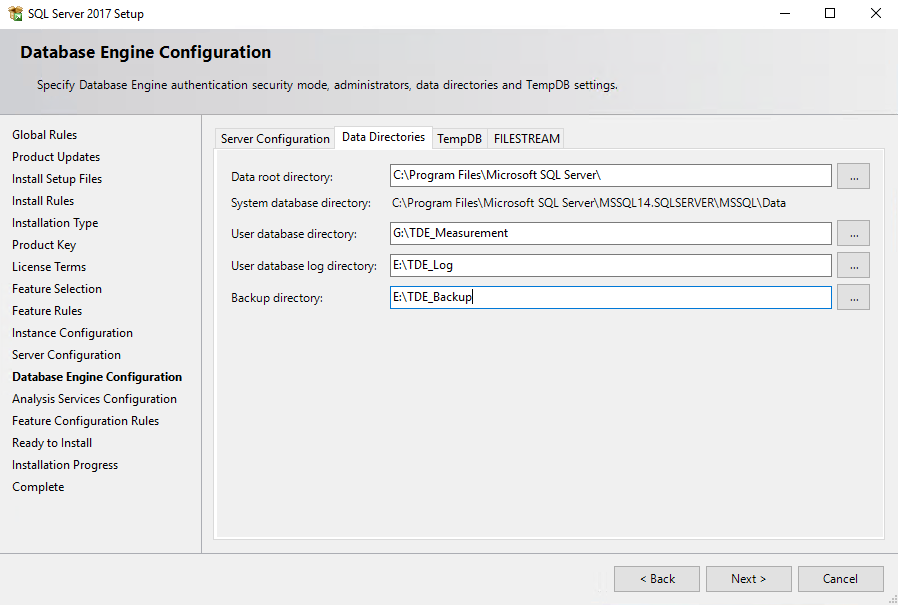
9. Click on ‘Data Directories’ and use the drives created in section 2.2.1.4 for various database directories as follows.
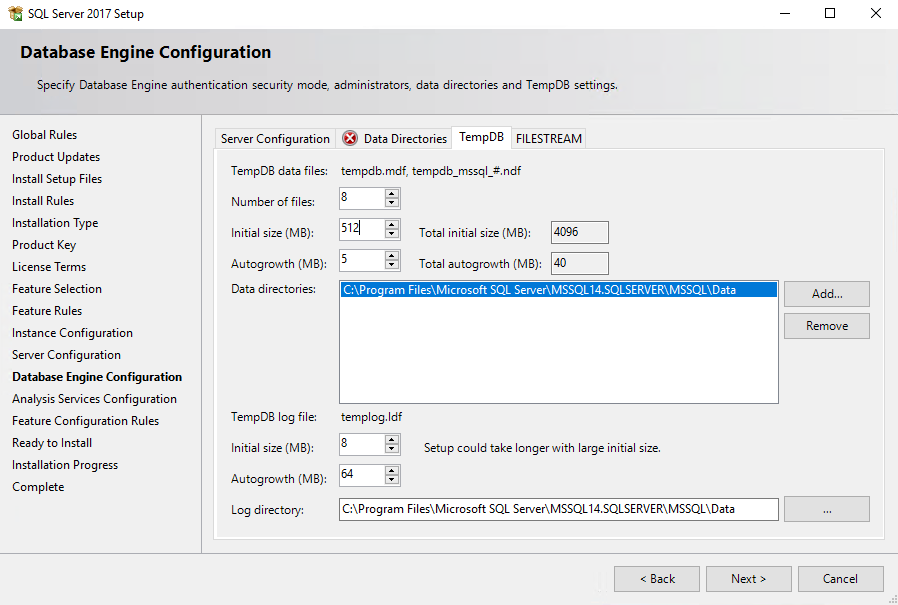
10. Click on the ‘TempDB’ tab and enter the TempDB settings (dependent on your system configuration). For more details, see 4.4.
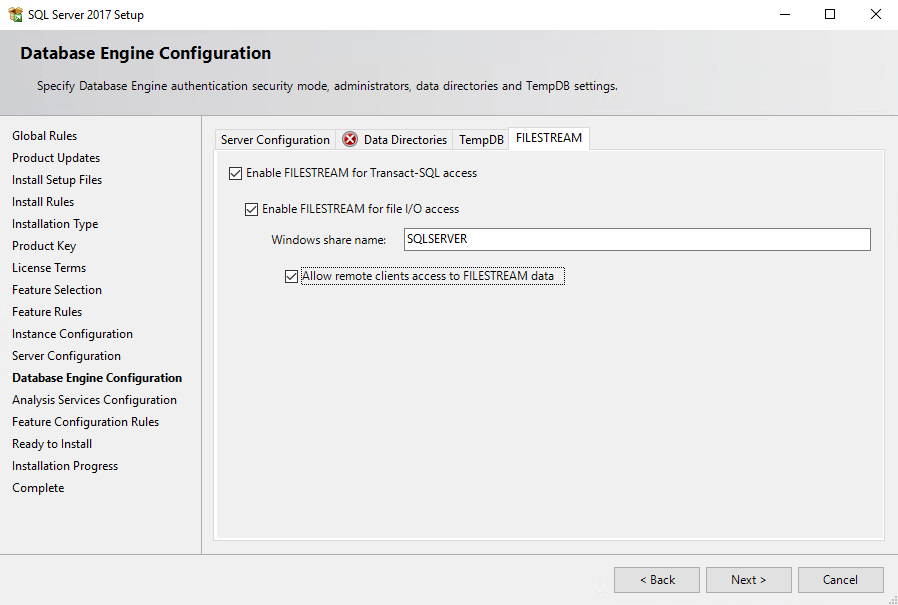
11. Click on the ‘FILESTREAM’ tab and check all and also give a windows share name (default same as SQL Server instance name).
12. Click next and go to ‘Analysis Services Configuration’ page. Select ‘Multidimensional and Data Mining Mode’. Add the user created in section 4.4.1 as administrative user.
13. Click on the ‘data Directories’ tab and provide appropriate folders for data, log, temp and backup. Click next and complete the installation.
4.4.3 SQL Server configuration
4.4.3.1 Logins
If virtual accounts are used for running SQL Server 2012 services, virtual account for SQL Server Analysis Services should be added as SQL Server database login.
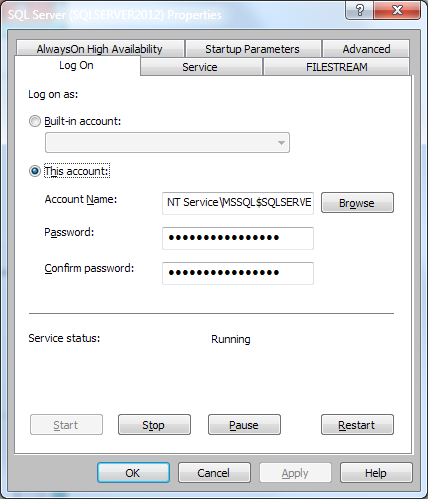
Start SQL Server Management Studio and connect to the Database Engine. Expand ‘Security’ from the left panel and right click on the ‘Logins’ that will display the context menu. Click on ‘New Login…’ and enter ‘NT Service\MSOLAP$<sql_instanceName> as login name (see the screen below). SQL Server Analysis Services uses this login to connect to the SQL Server Database Engine.
4.4.3.2 Memory configuration
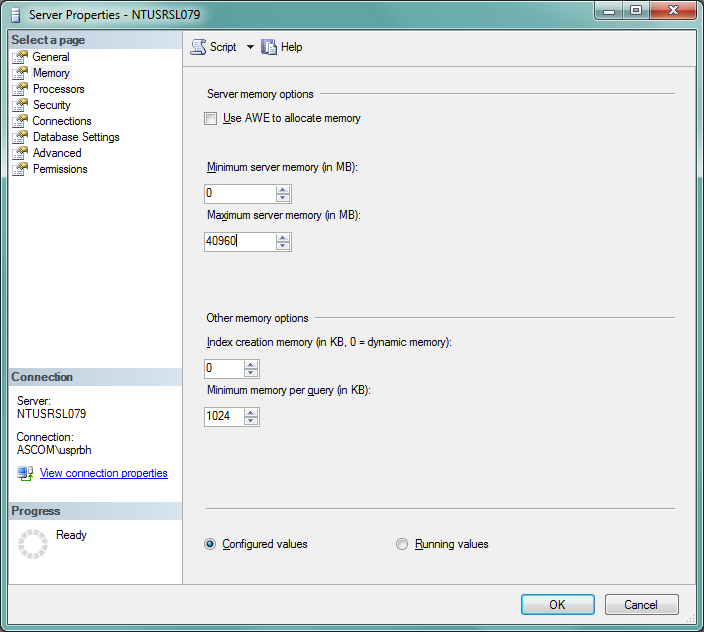
Restrict the SQL Server to use a fixed size of memory. Otherwise SQL Server will consume all system memory available and deprive other processes. This will slow down the system since system will be using virtual memory from page files.
Open Microsoft SQL Server Management Studio and right click on the SQL Server instance and click Properties. Click the Memory tab and set the Maximum server memory.
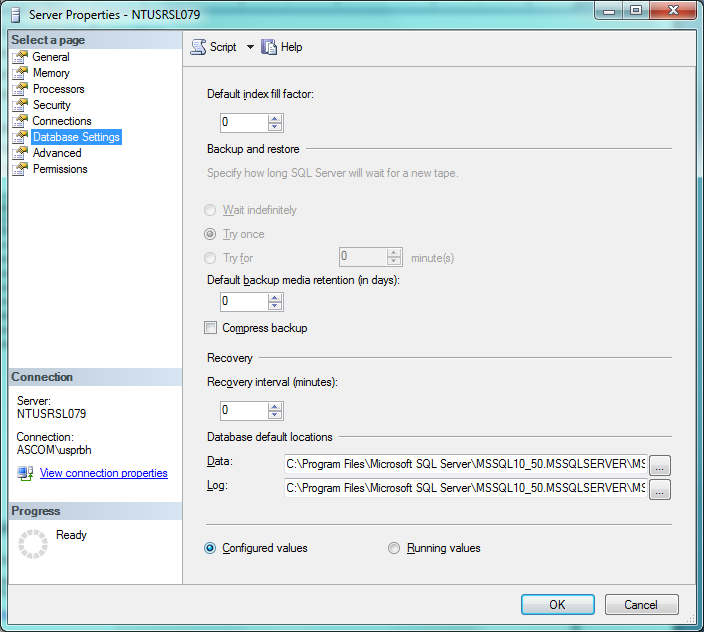
4.4.3.3 Default database location (optional)
Click the Database Settings and set the default Data and Log file location if you have not already configured during installation.
4.4.3.4 TEMPDB configuration
The TempDB system database is a global resource that is available to all users connected to the instance of SQL Server and is used to hold temporary user objects that are explicitly created, internal objects that are created by the SQL Server Database Engine etc.
The size and storage bandwidth of TempDB can affect the performance of a system. It is always better to use a high IOPs storage for TempDB.
For SQL version older than 2017 one tempdb file needs to be created via SQL command for each core of the system. If system has 4 processors and each processor has 8 cores than create 32 tempdb files. In section 2.2.1.2 drive D: is used for tempdb. 6 dives in RAID 0 configuration will provide 1080- 1200 IOPs. Use the following command to add a file to tempdb from SQL Server Management Studio (assume there is a folder ‘SQLServer2012’ under F: drive). ALTER DATABASE [tempdb] ADD FILE (NAME = N'tempdev01', FILENAME = N'F:\SQLServer2012\tempdev01.ndf', SIZE = 524288KB, FILEGROWTH = 5120KB)
Change ‘Name’ and ‘FILENAME’ in the above command and repeat it for all of the cores available in the system.
For SQL 2017 version TempDB should be created directly through TempDB tab.
4.4.3.5 SQL Server FILESTREAM configuration
If FILESTREAM is not configured during the installation of the SQL Server, use the following steps to enable and configure SQL Server FILESTREAM.
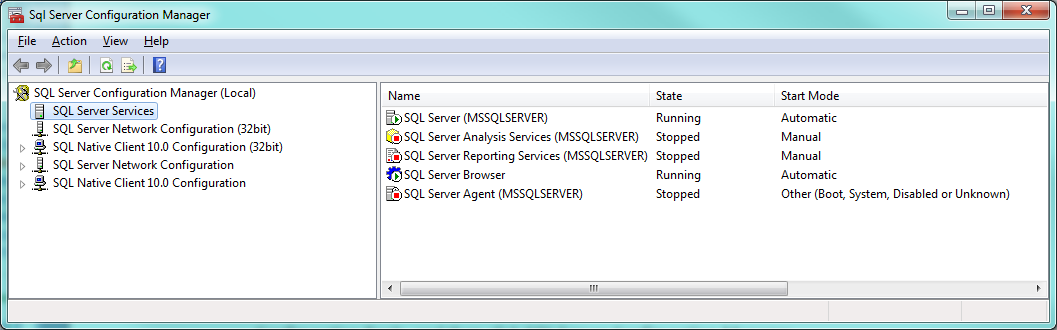
1. On the Start menu, point to All Programs; point to Microsoft SQL Server, point to Configuration Tools, and then click SQL Server Configuration Manager.
2. In the list of services, right-click SQL Server Services, and then click Open.
3. In the SQL Server Configuration Manager snap-in, locate the instance of SQL Server on which you want to enable FILESTREAM.
4. Right-click the instance and then click Properties.
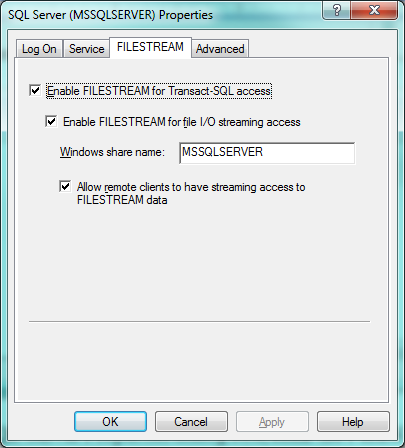
5. In the SQL Server Properties dialog box, click the FILESTREAM tab.
6. Select the Enable FILESTREAM for Transact-SQL access check box.
7. If you want to read and write FILESTREAM data from Windows, click Enable FILESTREAM for file I/O streaming access. Enter the name of the Windows share in the Windows Share Name box.
8. If remote clients must access the FILESTREAM data that is stored on this share, select allow remote clients to have streaming access to FILESTREAM data.
9. Click Apply.
10. In SQL Server Management Studio, click New Query to display the Query Editor.
11. In Query Editor, enter the following Transact-SQL code:
EXEC sp_configure filestream_access_level, 2
RECONFIGURE
12. Click Execute.
13. Restart the SQL Server service.
14. Right-click the OLAP virtual directory you just created, and then click Convert to Application.
15. In the Add Application dialog box, next to Application Pool, click Select and then choose the OLAP application pool that you created in the previous section.
16. Click OK twice to accept the changes, and to convert the application.
4.4.4 Configure SQL Server Analysis Services
4.4.4.1 Configure Analysis Services Server Administrators
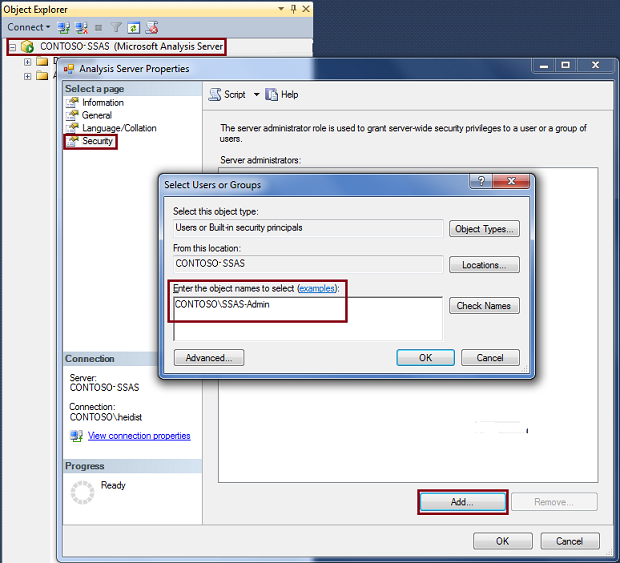
1. In SQL Server Management Studio, connect to the instance of Analysis Services, and then right-click the instance name in Object Explorer and then click Properties.
2. Click Security in the Select a Page pane, and then click Add at the bottom of the page to add one or more Windows users or groups to the server role.
3. At installation time, SQL Server Setup requires that you specify at least one user account as the Analysis Services system administrator.
4.4.4.2 Grant read permission to cubes
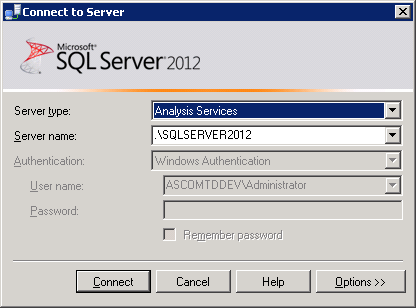
1. In SQL Server Management Studio, connect to Analysis Services.
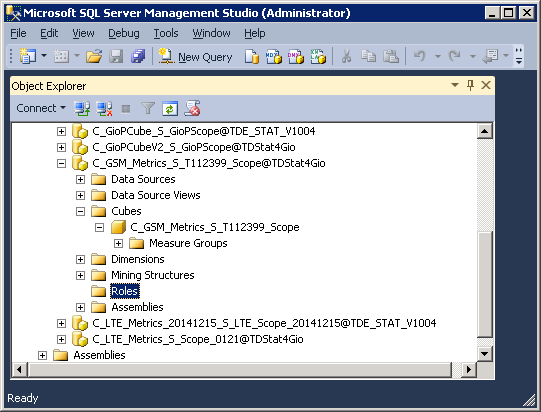
2. Open the Databases folder in Object Explorer, and select a cube database.
3. Right-click Roles and choose New Role. Notice that roles are created at the database level and apply to objects within it. You cannot share roles across databases.
4. In the General pane, enter a name, and optionally, a description. This pane also contains several database permissions, such as Full Control, Process Database, and Read Definition. None of these permissions are needed for querying a cube.
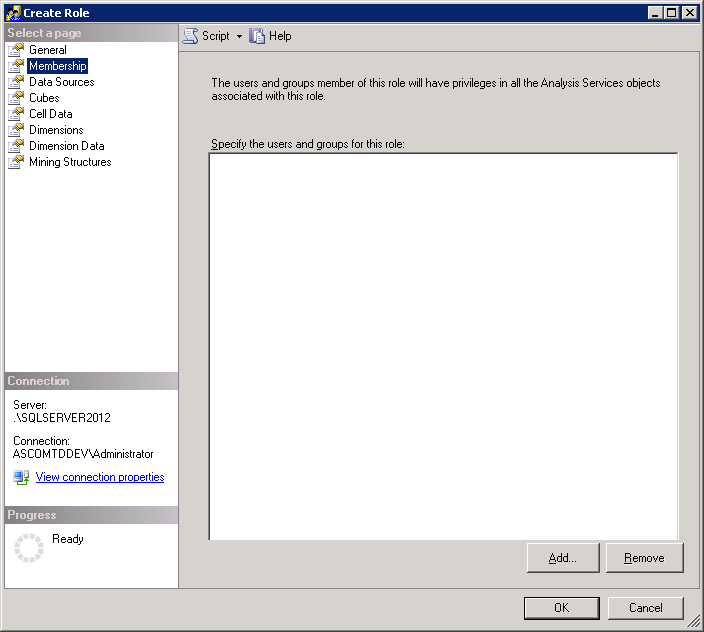
5. In the Membership pane, click Add to enter the Windows user or group accounts that will be accessing the cube using this role. Analysis Services only supports Windows security identities.
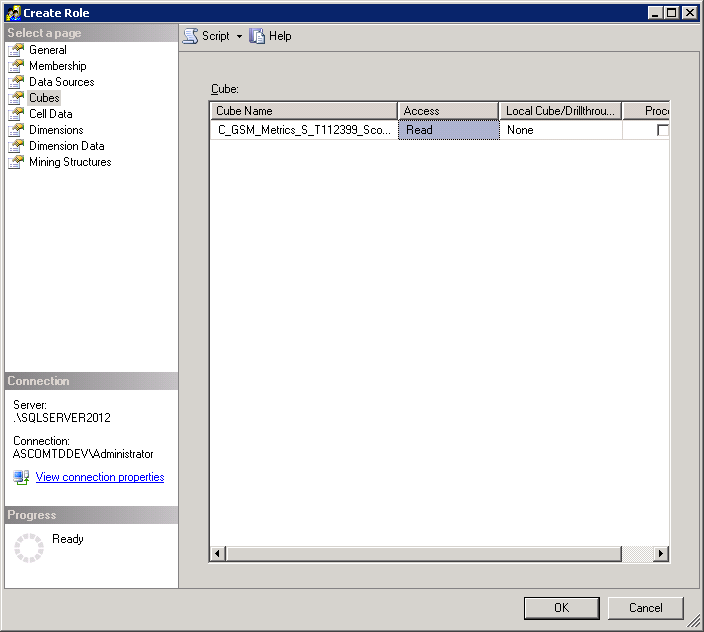
6. In the Cubes pane, select a cube, and then click Read access. Read access is sufficient for accessing cube data from client machines.
7. Click ‘OK’ to grant permission to the users.