4.3 Configuration
• Start TEMS Discovery Enterprise
• Select Configuration | Options.
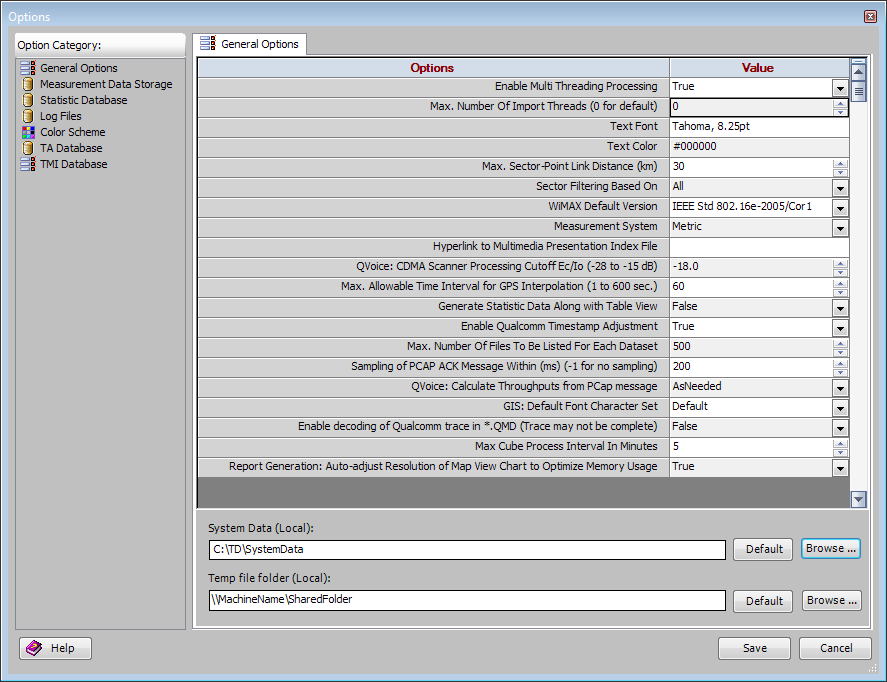
4.3.1 General Options
4.3.2 Configure TEMS Discovery Enterprise temporary data processing folder.
Create the following folders in the E: drive configured in section 2.2.1.2. · TD\SystemData (share as \\ServerName\SystemData) for storing system configuration data and error log message files.
· TD\Temp for temporary local storage use.
Select ‘General Options’ category from the left tab:
· System Data (Local): Populate ‘E: \TD\SystemData’ folder address and share the folder with ‘Everyone’ with read\write access.
· Temp file folder (Local): Populate ‘E: \TD\Temp’ folder address.
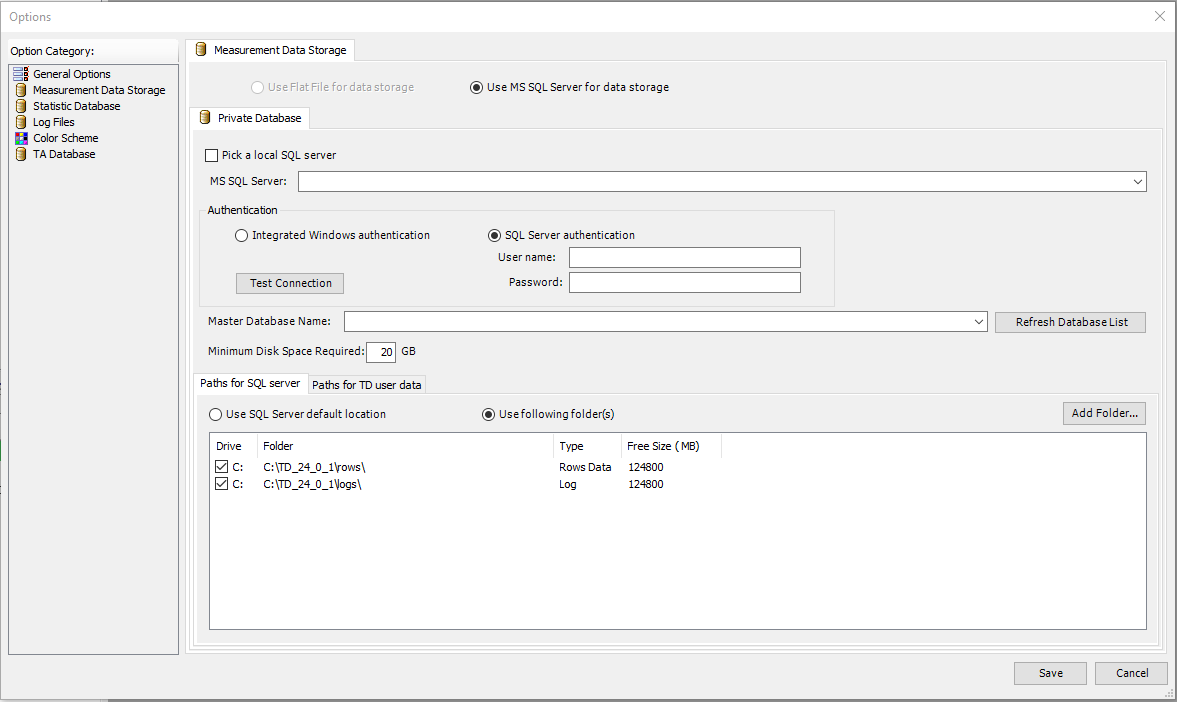
4.3.3 Configure Measurement Data Storage
1. Select ‘Measurement Data Storage’ category from the left tab.
2. Select ‘Use MS SQL Server for data storage’ option.
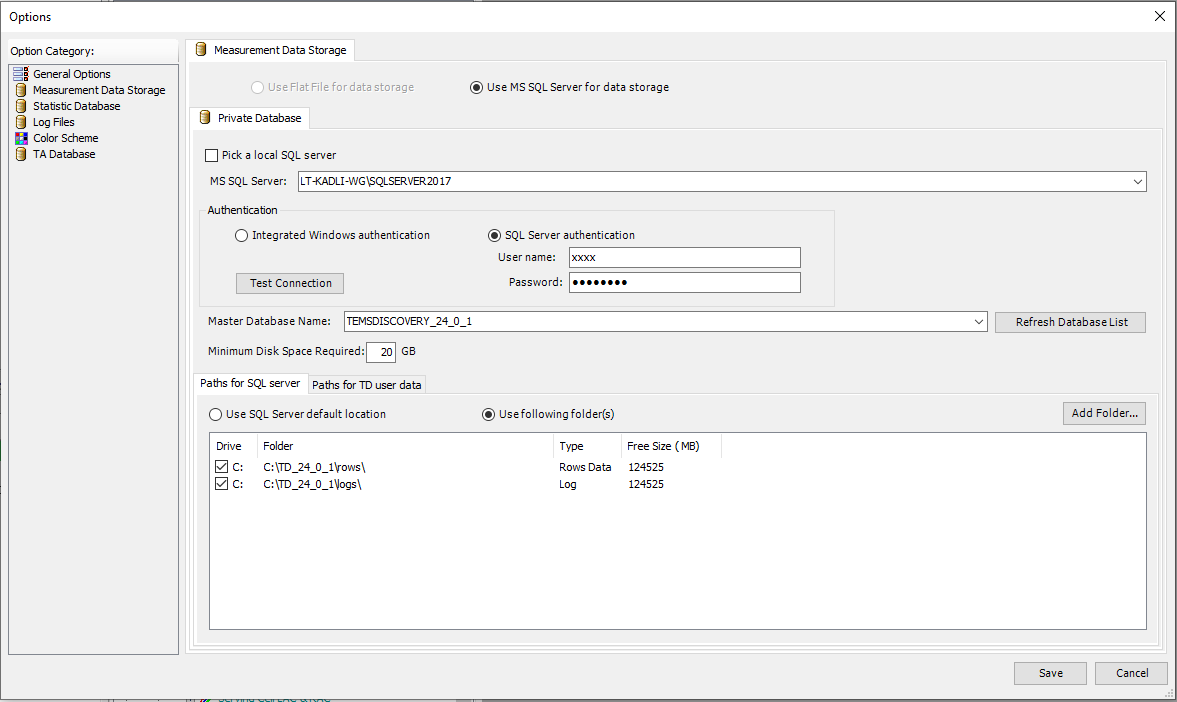
3. Select or enter a SQL Server instance name to use. If the instance name is default instance type in only server name otherwise enter server name and instance name as SERVERNAME\\INSTANCENAME
4. Choose either ‘SQL Server authentication’ or ‘Integrated Windows authentication’. ‘SQL Server authentication’ requires a username and password that has sysadmin Server Roles in the database.
5. Enter TEMS Discovery Enterprise configuration (master) database name. If you are upgrading an existing installation, select the old TEMS Discovery Enterprise configuration database.
6. Configure the folders for creating Measurement Database primary data file (Rows Data), Database transaction log file (Log) and file stream database path (to store Layer3 messages).
7. Use H: drive for ‘Rows Data’, F: drive for ‘Logs’.
8. Click Use followings folder(s).
9. Click Add Folder to select the folders.
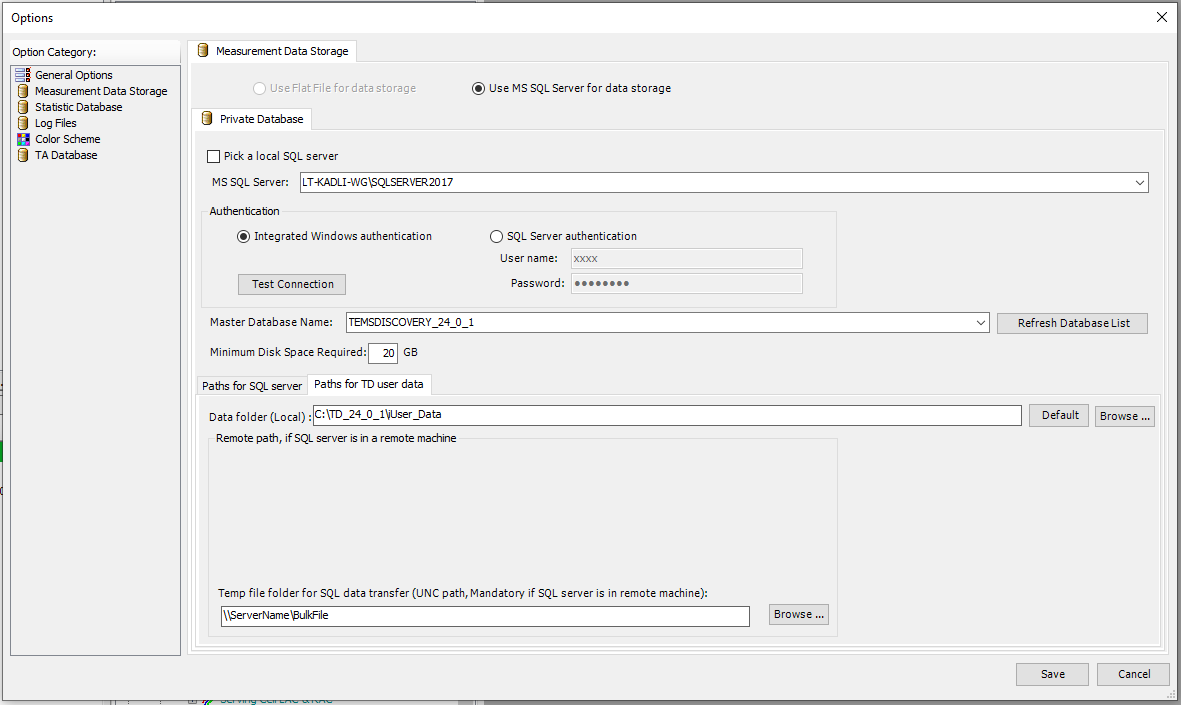
The following steps are needed only if SQL Server is installed in a separate machine.
Click on the ‘Paths for database data’ tab of the ‘Measurement Data Storage’ screen.
Create the following folders TDE Data Processing machine E: drive:
· TD\UserData_db (share as \\ServerName\UserData_db) for storing intermediate TD files.
· TD\ BulkFile (share as \\ServerName\BulkFile) for storing SQL Server bulk insert temporary files.
Make the above folders Windows sharable to ‘Everyone’ with read\write access. For ‘Data folder (Local):’ field select ‘E: \TD\UserData_db’. For ‘Temp file folder for SQL Bulk Insert:’ field select ‘E: \TD\BulkFile’. In case SQL Server is in a remote machine, select ‘\\ServerName\BulkFile’ network path.
Notes:
⋅ Statistics Database is not supported for (1) TDE File Mode and (2) TDE Database Mode using SQL Server Authentication.
⋅ Please ensure that the path specified under ‘Temp file folder for SQL data transfer (UNC path is mandatory if SQL server is located in a remote machine)’ is different from the path specified under Options > General Options > ‘Temp file folder (Local)’.
4.3.4 Configure Statistics Database
1. Select ‘Statistic Database’ category from the left tab.
2. Select ‘Enable statistics database’ check box
3. Populate ‘BulkFile’ folder network path created above (\\ServerName\BulkFile) if SQL Server is located in a remote machine.
4. Click Add button to enter Analysis Services database information.
Notes:
⋅ Statistics Database is not supported for (1) TDE File Mode and (2) TDE Database Mode using SQL Server Authentication.
⋅ Please ensure that the path specified under Options > Statistic Database > ‘Temp file folder for SQL BulkInsert’ (UNC path is mandatory if SQL server is located in a remote machine)’ is different from the path specified under Options > General Options > ‘Temp file folder (Local)’.
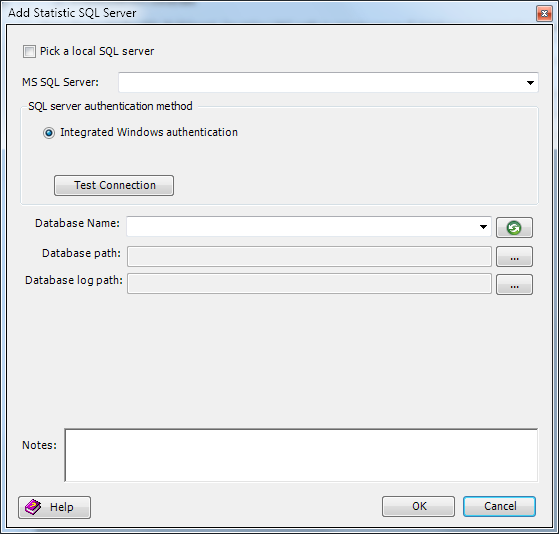
4.3.5 Configure Statistics Database connection
1. Enter Analysis Services database server name or IP address
2. Select authentication type (currently only Integrated Windows authentication supported).
3. Enter or select a database name.
4. For ‘Database path:’ browse to the folder where you want to place Database primary data file.
5. For ‘Database log path:’ browse to the folder where you want to place Database transaction log file.
4.3.6 Archiving of log files
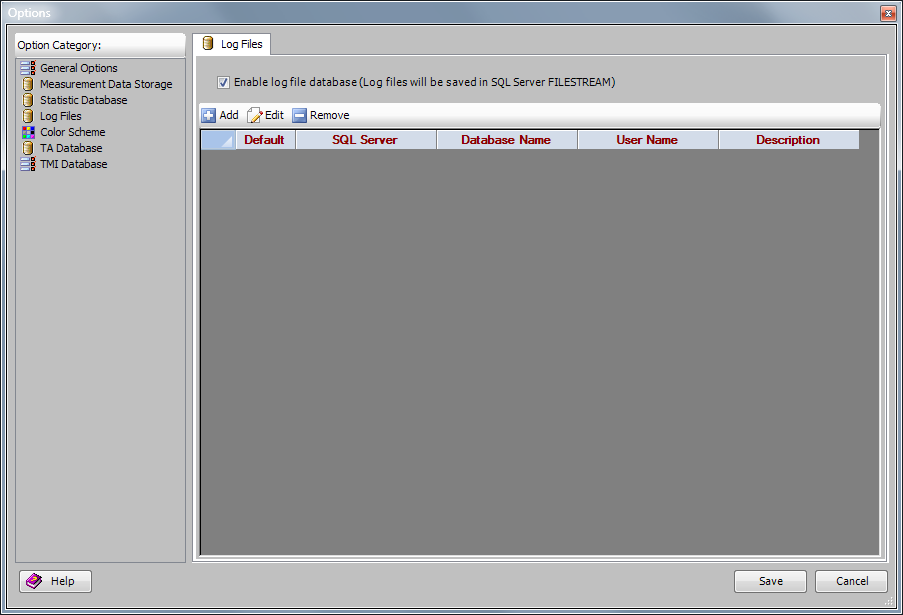
To archive all the log files processed in TEMS Discovery Enterprise, configure SQL Server FILESTREAM database. Archiving of log files in SQL Server Standard Edition is supported for databases created with TDE version 26.1.0 or newer. Use the following steps only if archival of binary log files are needed for future use. Make sure SQL Server FILESTREAM is enabled.
1. Click the ‘Log Files’ from ‘Option Category’ and check ‘Enable log file database’.
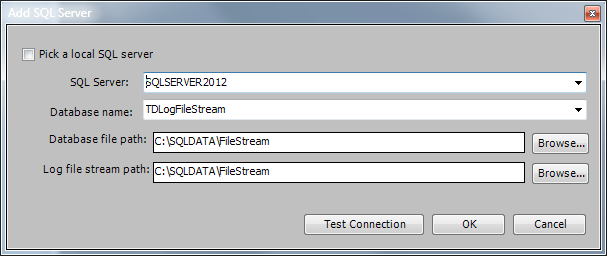
2. Click ‘Add’ to configure a log file FILESTREAM database.
3. In the ‘Add SQL Server’ window provide the SQL Server instance name, database name, file path for Database primary data file and Database transaction log file.
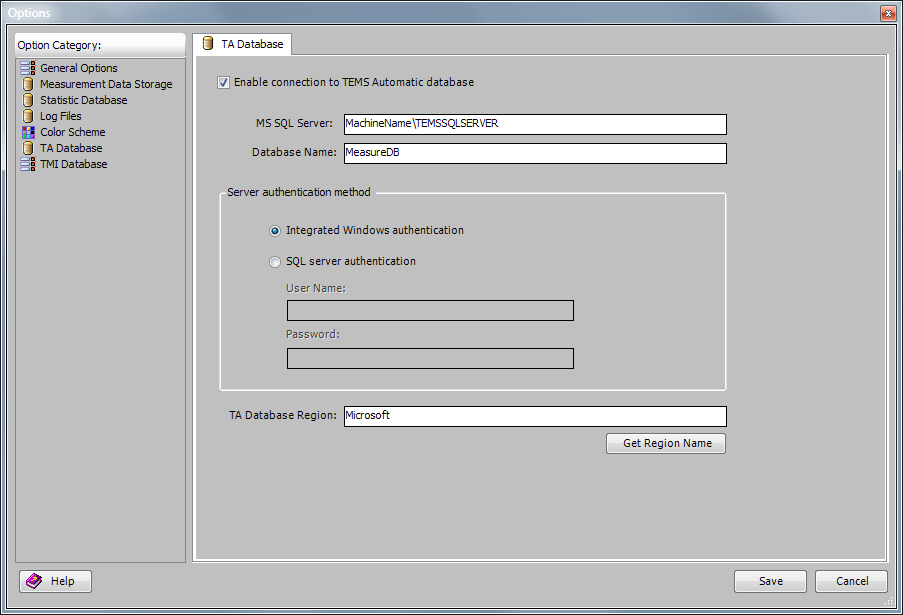
4.3.7 TA Database
Provide connection information for TEMS Automatic measurement database to merge mobile and TEMS Automatic Call Generator’s service quality data. MTU name, group name and serial number also retrieve from this database.
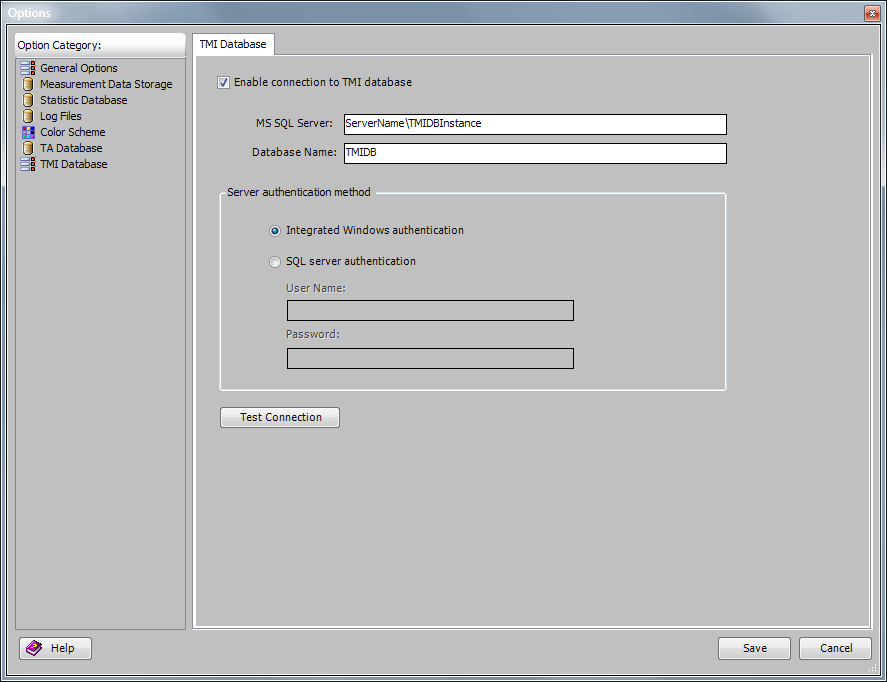
4.3.8 TMI Database
To import TMI drive test data into TEMS Discovery database provide connection to the SQL Server instance of the TMI database.
4.3.9 Table Partitioning
Table partitioning is automatically enabled for Measurement, Statistics and Log file (FILESTREAM) databases in SQL Server Enterprise Edition.
For TDE installations using SQL Server Standard Edition, Measurement database projects created with TDE version 26.1.0 and newer will have table partitioning enabled, while the ones created with older TDE versions will have table partitioning disabled. Table partitioning in SQL Server Standard Edition will only be enabled for Statistics and Log file databases created in TDE version 26.1.0 and newer, while it will be disabled for Statistics and Log file databases created with older TDE versions.